
Hello everyone! I hope you’ve got the items ready. Here’s a recap:

You will need the following items:
1. A stitched piece, size ½” to 1” allowance around the front of your book or a part of it if you prefer.
2. Some coordinating fabric for the side, back and inside flap of the book.
3. Muslin or calico for the backing
4. Book to cover 😉
5. Matching sewing threads
6. Ribbons to tie (optional)
Instructions for a particular step will be at the bottom of the picture (if any).
Step 1

Determine the size of your stitched piece that will cover the book and pull one thread from each side of the stitched piece. This will help to ensure the lines that you machine sew are straight. The stitched piece can cover the front of the book or partially or cover the front and back of the book. It’s up to you. In my example the stitched piece covers the front of the book partially.
Step 2

Measure and cut the length and width that you will need to cut from the co-coordinating fabric. Wrap from the left edge (where one thread was pulled) to the back of the book. Add necessary seam allowances on all sides. Machine sew the coordinating fabric and the stitched piece. Iron open the seam.
Step 3

Cut 2 additional pieces of the coordinating fabric about ½ the width of your book, add necessary seam allowances. Machine sew one edge of both the flaps after measuring and ironing a double seam.
Step 4
Cut the backing fabric the same size as the cover piece.
Step 5

Sewing them all together. Lay the cover piece right sides up. Place the flaps, wrong side up on the both sides of the cover piece with the stitched edge towards the middle. Pin accordingly.
Step 6

Place the backing fabric wrong side up and again pin accordingly.
Step 7

Machine sew from the top of the back portion of covered piece, about and inch before the flap starts. Backstitch a couple of stitches to fasten the beginning. Proceed to sew up all 4 sides but leave about a 3” opening for turning. Again backstitch when you end.
Step 8

Trim all sides to 1/4″ and cut the corners to reduce bulk.
Step 9
Turn the cover inside out. It’ll be a mess but nothing that cannot be ironed out 🙂
Step 10

Stitch by hand to close the opening with matching thread.
Step 11

Give it a good ironing. Insert the book covers into the flap and there you have it your very own book cover! 🙂


Optional embellishments:
- Add a piece each of rick-rack, lace or ribbon on the sewn edge of the book flaps
- Add two long strips each of ribbon at mid point of the right and left edge of the book for a ribbon tie closure
- Add a small loop of ribbon/cord on the front side edge of the book and a larger loop at the back. Slip the larger loop into the smaller loop creating a closure that you can wrap around your wrist
- Add a ribbon/cord for bookmark where the opening was and stitch by hand or securely by machine.
- And anything else you can think of!
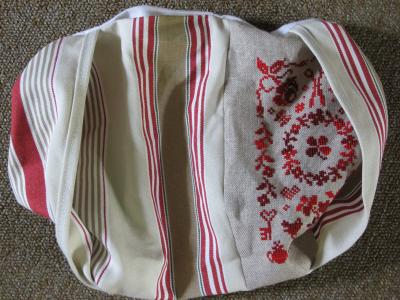
Samples of book covers:
If you have any questions please feel free to comment here and I will answer them in the comment section itself so as to centralise the Q&A for everyone’s benefit.
Thank you all for joining our tutorial this weekend. Pictures are always welcomed 🙂

OMG! (Thumping self on forehead.) You’ve made it all seem so simple! Thank you!
Fabulous tutorial! Thanks so much!
Well done Barbara! This has so many uses and possibilities…It’s great!
very very nice! thanks!
thanks a lot for this tutorial, it’s very clear to me ! hugs
I’ve been searching all over for this pattern.
Can you please tell me where I can find it?
felicitaciones, bien el grafico se entiende
cariños
ana
holvqcepd trshldok gxuzbld zgxm rtysn yzhwp hsozrwqp
Grazie per il tutorial! Thank you!
Ciao dall’Italia!
Simple and understandable. Thank you!
Molto bello!!! Tank you!!!
Just what I was looking for. You made it possible to do that invisible stitching.
Thank You !!!