
This time round the scissor fob I’ve chosen is a simple pillow with a corded edging. I think it is better to use a home-made cord for this, as it is softer to manipulate, but you can always try to use purchased cord if the home-made cord intimidates you too much!

Materials needed:
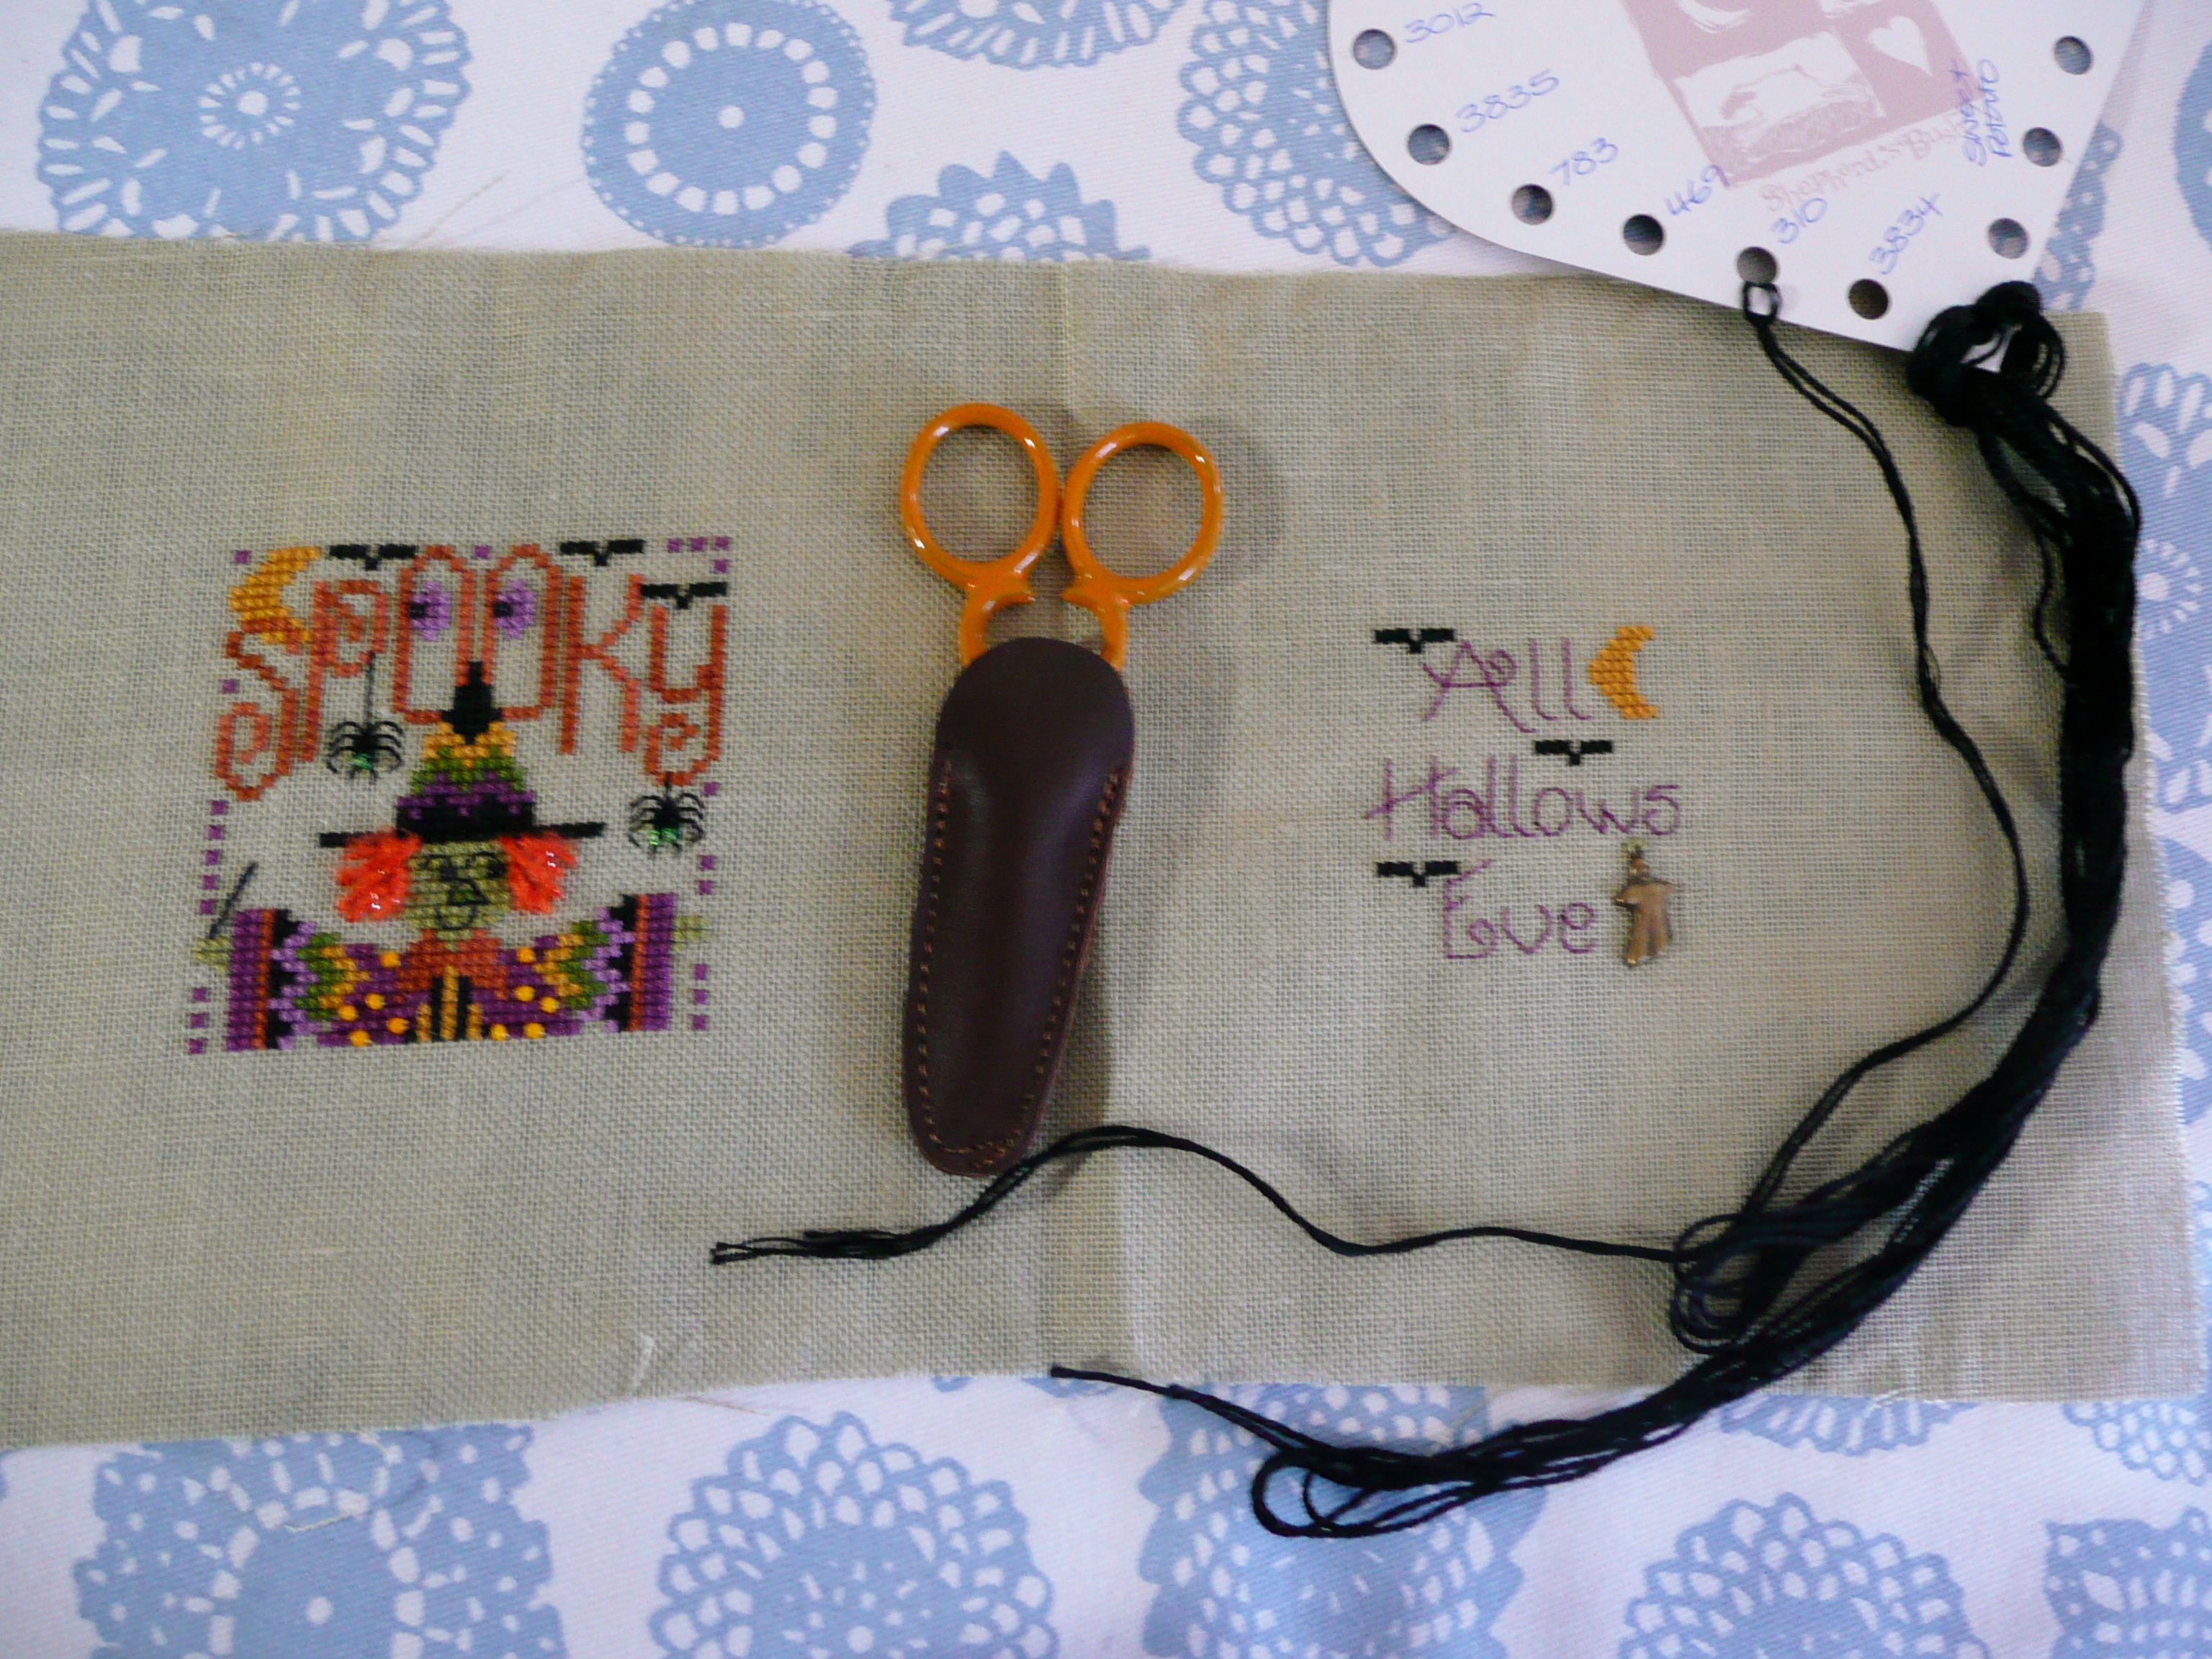
- Your chosen stitched piece, including a front and back
- Polyfil stuffing or other stuffing of your choice (eg teddy bear pellets or crushed walnut shells)
- DMC pearl cotton or cotton floss for cording
- DMC cotton floss for attaching the cord
- Sewing needle (either a sharp or tapestry needle)
- Pins and scissors
1. First of you you need to cut the front piece of your stitching into the desired size. I find the easiest way is to count the number of threads when using linen or the number of holes when using aida. In this case I followed the design’s suggestion and counted out 25 threads from the stitching, then I pulled out the next thread – this makes a clean line for you to cut the excess fabric away. Then once all 4 sides of the front piece have been cut, place it face down onto the back piece, with right sides of the stitching facing each other, and cut out the back to be the same size (don’t forget to make sure the back piece is centred correctly before starting to cut – I usually do this by holding the two pieces up together in front of a light source such as a bright window). Pin the two pieces together.


2. Sew a seam around the edges, but leave an open gap at the bottom seam to allow you to turn it inside out and add the stuffing. I usually leave one long tail of the sewing thread that I use for sewing up the opening at the end.


3. Cut away the corners, but don’t cut too close to the stitching, otherwise it may unravel when you turn the piece inside out. Then trim back the side seams a little so they aren’t as bulky when turned inside out.


4. Turn your stitching inside out. You may want to ease the corners with a chopstick or something similar for a crisper ‘point’ at the corners – be careful, though, so you don’t make holes in the corners (yes, that’s the voice of experience talking from my first attempt years ago!).

5. Now it’s time to stuff with your choice of stuffing material. In this case I’ve chosen Polyfil, and once again I use a chopstick to ease some of the stuffing gently into the corners. The amount of filling you use is down to personal preference – I prefer mine not to be over-stuffed, but firm enough to feel ‘full’.


6. Next you close up the opening in the bottom seam. My preference is to use a ladder stitch, however you can use a whip-stitch if that is easier for you. To do a ladder stitch you just work your way alternatively up each side of the seam, taking a few threads in your needle for each stitch – this looks like the rungs of a ladder when the stitches are loose, and when you pull them tight they close up the seam very cleanly.


7. Now it’s time to make your cording. To do this you’ll need to have quite long pieces of thread, and I used 3 strands of pearl cotton that was supplied with my scissor fob kit. Details of how to make cording yourself can be found in Scissor Fob #1 Tutorial.

8. Firstly you need to fold your cording in half and place a knot at approx 3 1/2″ to 4″ from the end. Of course you may prefer a longer hanger, so feel free to make it as long as you want, just as long as you have enough cord to go around the edges 🙂


9. When we start to attach the cording around the edge of the scissor fob ‘pillow’, I find it easiest to place a pin through the centre of the cord knot and take it down into the pillow at the centre of the top seam. From there I take the cord along the top seam and add two more pins to hold the cord in place temporarily. I start off my thread by poking my needle through the top of the pillow, through the stuffing; pull the needle so the thread just disappears from view under the fabric, then add a few little catch stitches at the back of the knot (because I’m using black thread you can’t see these stitches, if you’re using another colour where the stitching thread shows up, you may want to do your catch stitches underneath the knot out of sight).

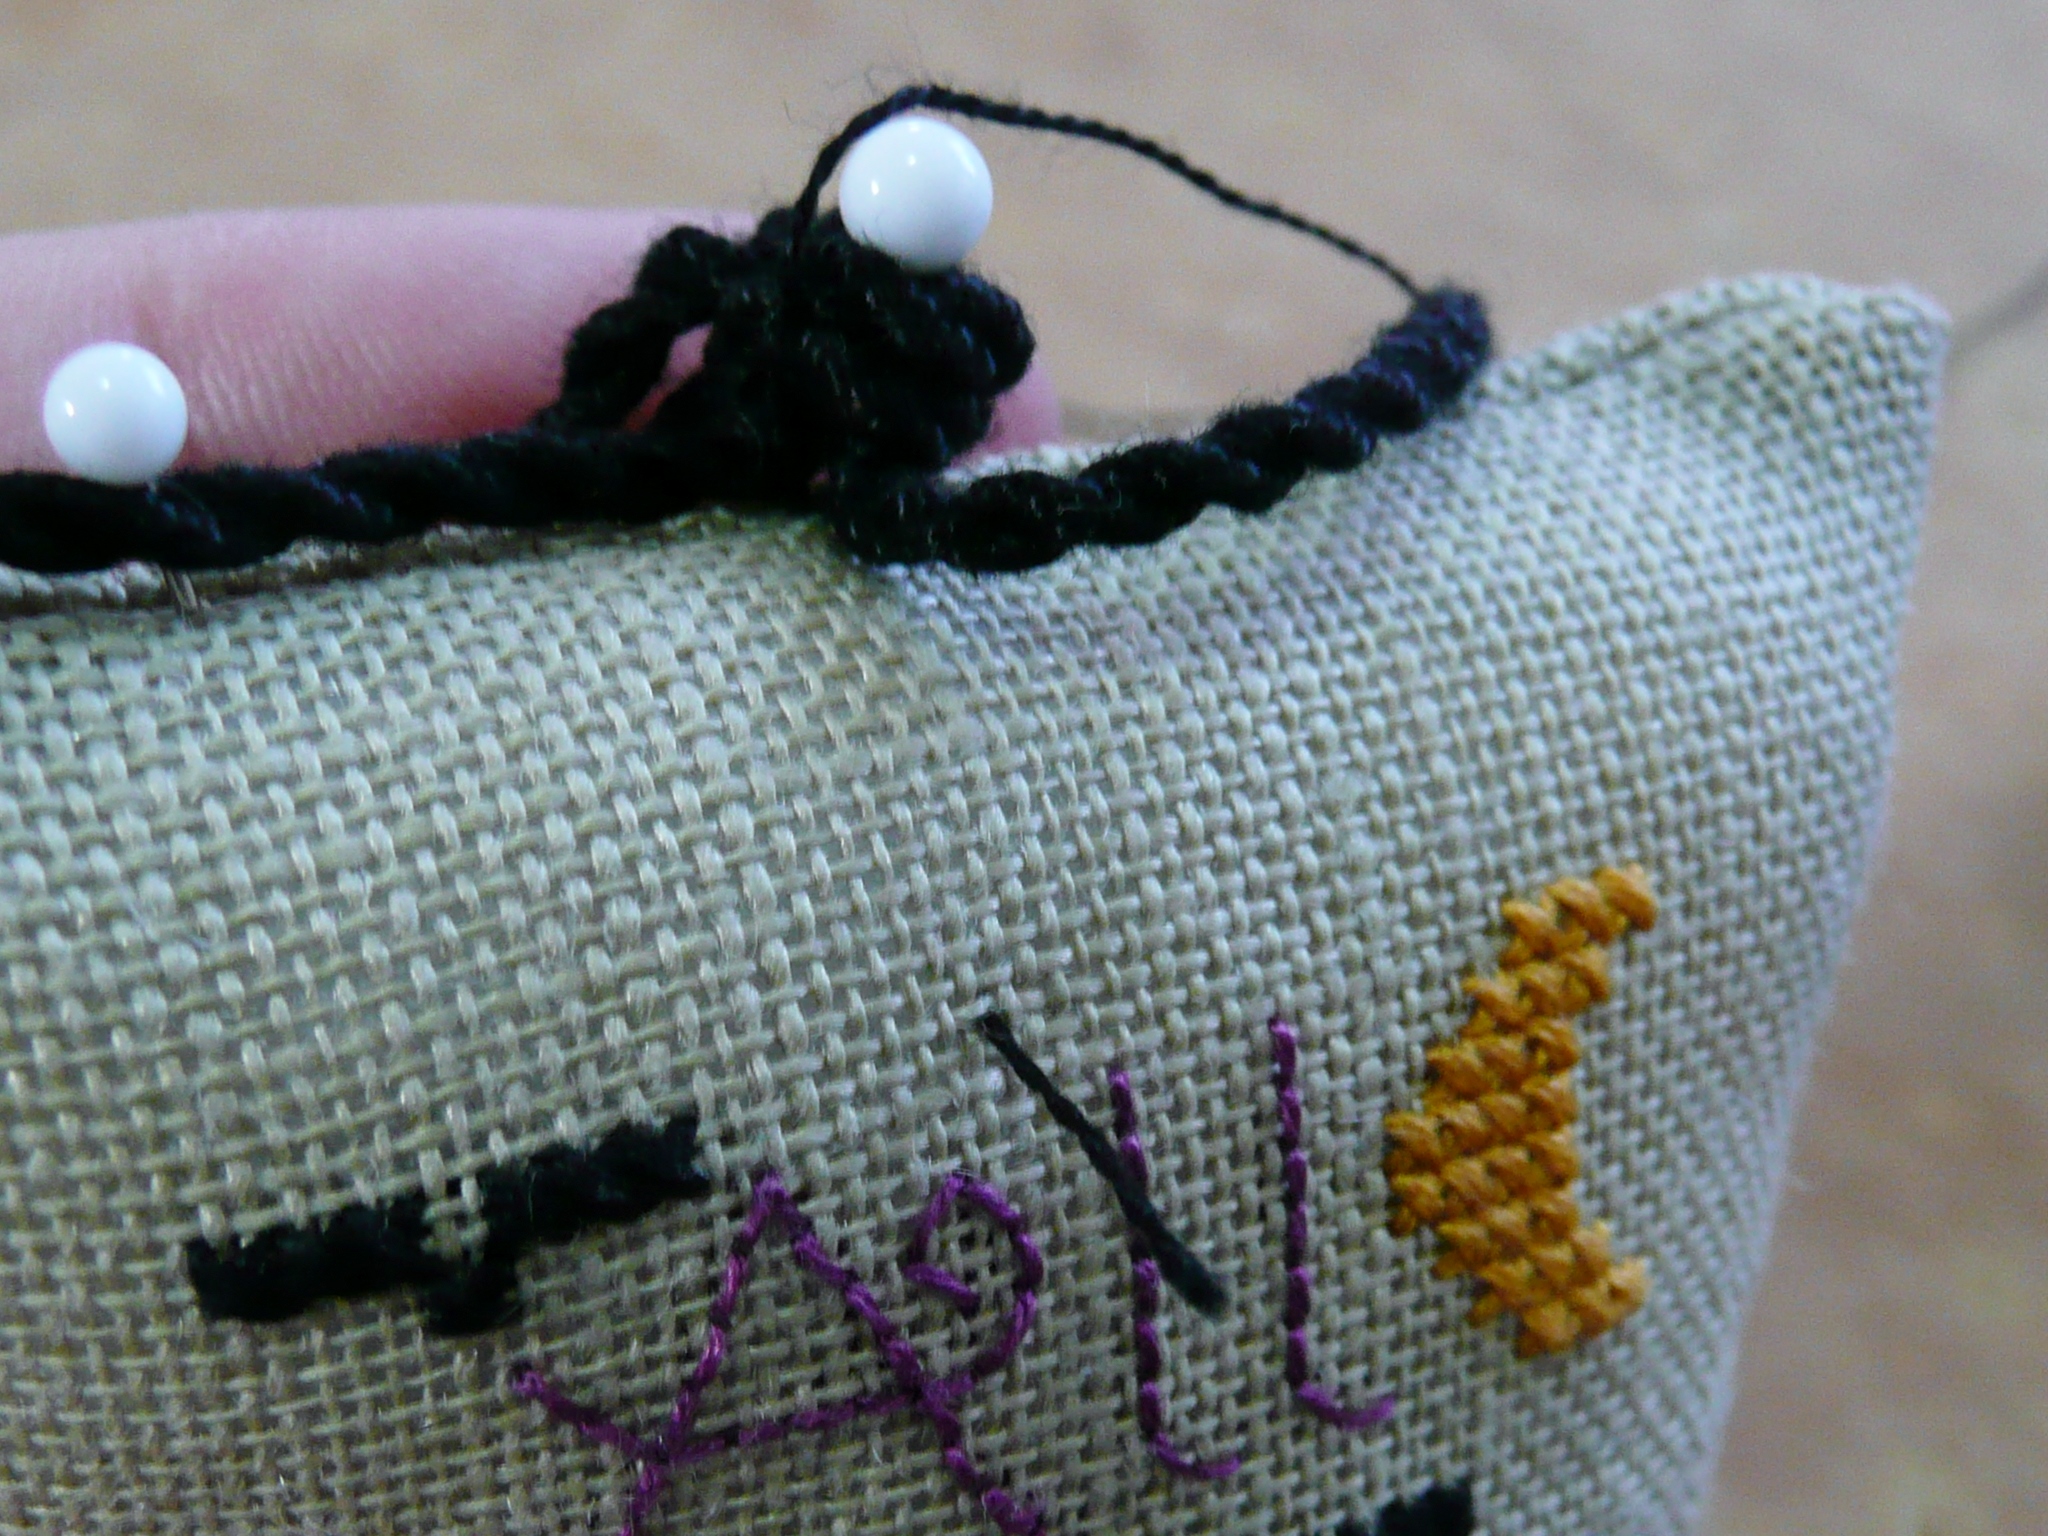


Bring your needle to one side of the cord and take a small stitch under the seam – I try to put my needle in about 1 thread away from the seam, and come up approx 1 thread away from the seam on the other side, so it’s less likely to be seen. (I pulled my knot up out of the way to show you the stitches, which pulled my loose tail out, so you need to be careful if you do this yourself!)


Now you take your needle and thread over the top of the cording to the right-hand side once again, and this time put your needle through the fabric just in front of the next twist in the cord. You should use the cord as your guideline here for the length of your stitches – your top thread should follow the ‘furrows’ in the cording and sit neatly in the shape of the cord.

Unfortunately it’s quite difficult to see this with the black thread, so I have use another piece of cord with a contrasting thread as an example so you can see more clearly what I mean …

My cord is a dark colour, so I prefer to use the above method to attach my cording – sometimes, though, if you’ve used a variegated thread, or if your cording is a lighter colour, you may prefer to attach the cord with a small stitch underneath the cord attaching it to the fabric. To do it this way you just need to take your needle through the cord at the bottom the cord:

Then take your needle through the fabric seam underneath the cord, bringing the needle through on a diagonal … then continue the same way until the cord is attached.


Now after that little cording detour, it’s back to finishing off the scissor fob …
At this point you can remove the pins once your stitching is well underway. Continue stitching the cord around the edge, stopping at the centre of the bottom seam.


Now go back up to the top of the cord and do the remaining side the exact same way, and finish off your thread by taking a couple of small stitches into the cord. Once again I ‘bury my thread’ by taking my needle into the pillow and coming up a wee way away and cutting off the thread flush with the pillow fabric … then you just give your pillow a quick squeeze and the end of the tail disappears.
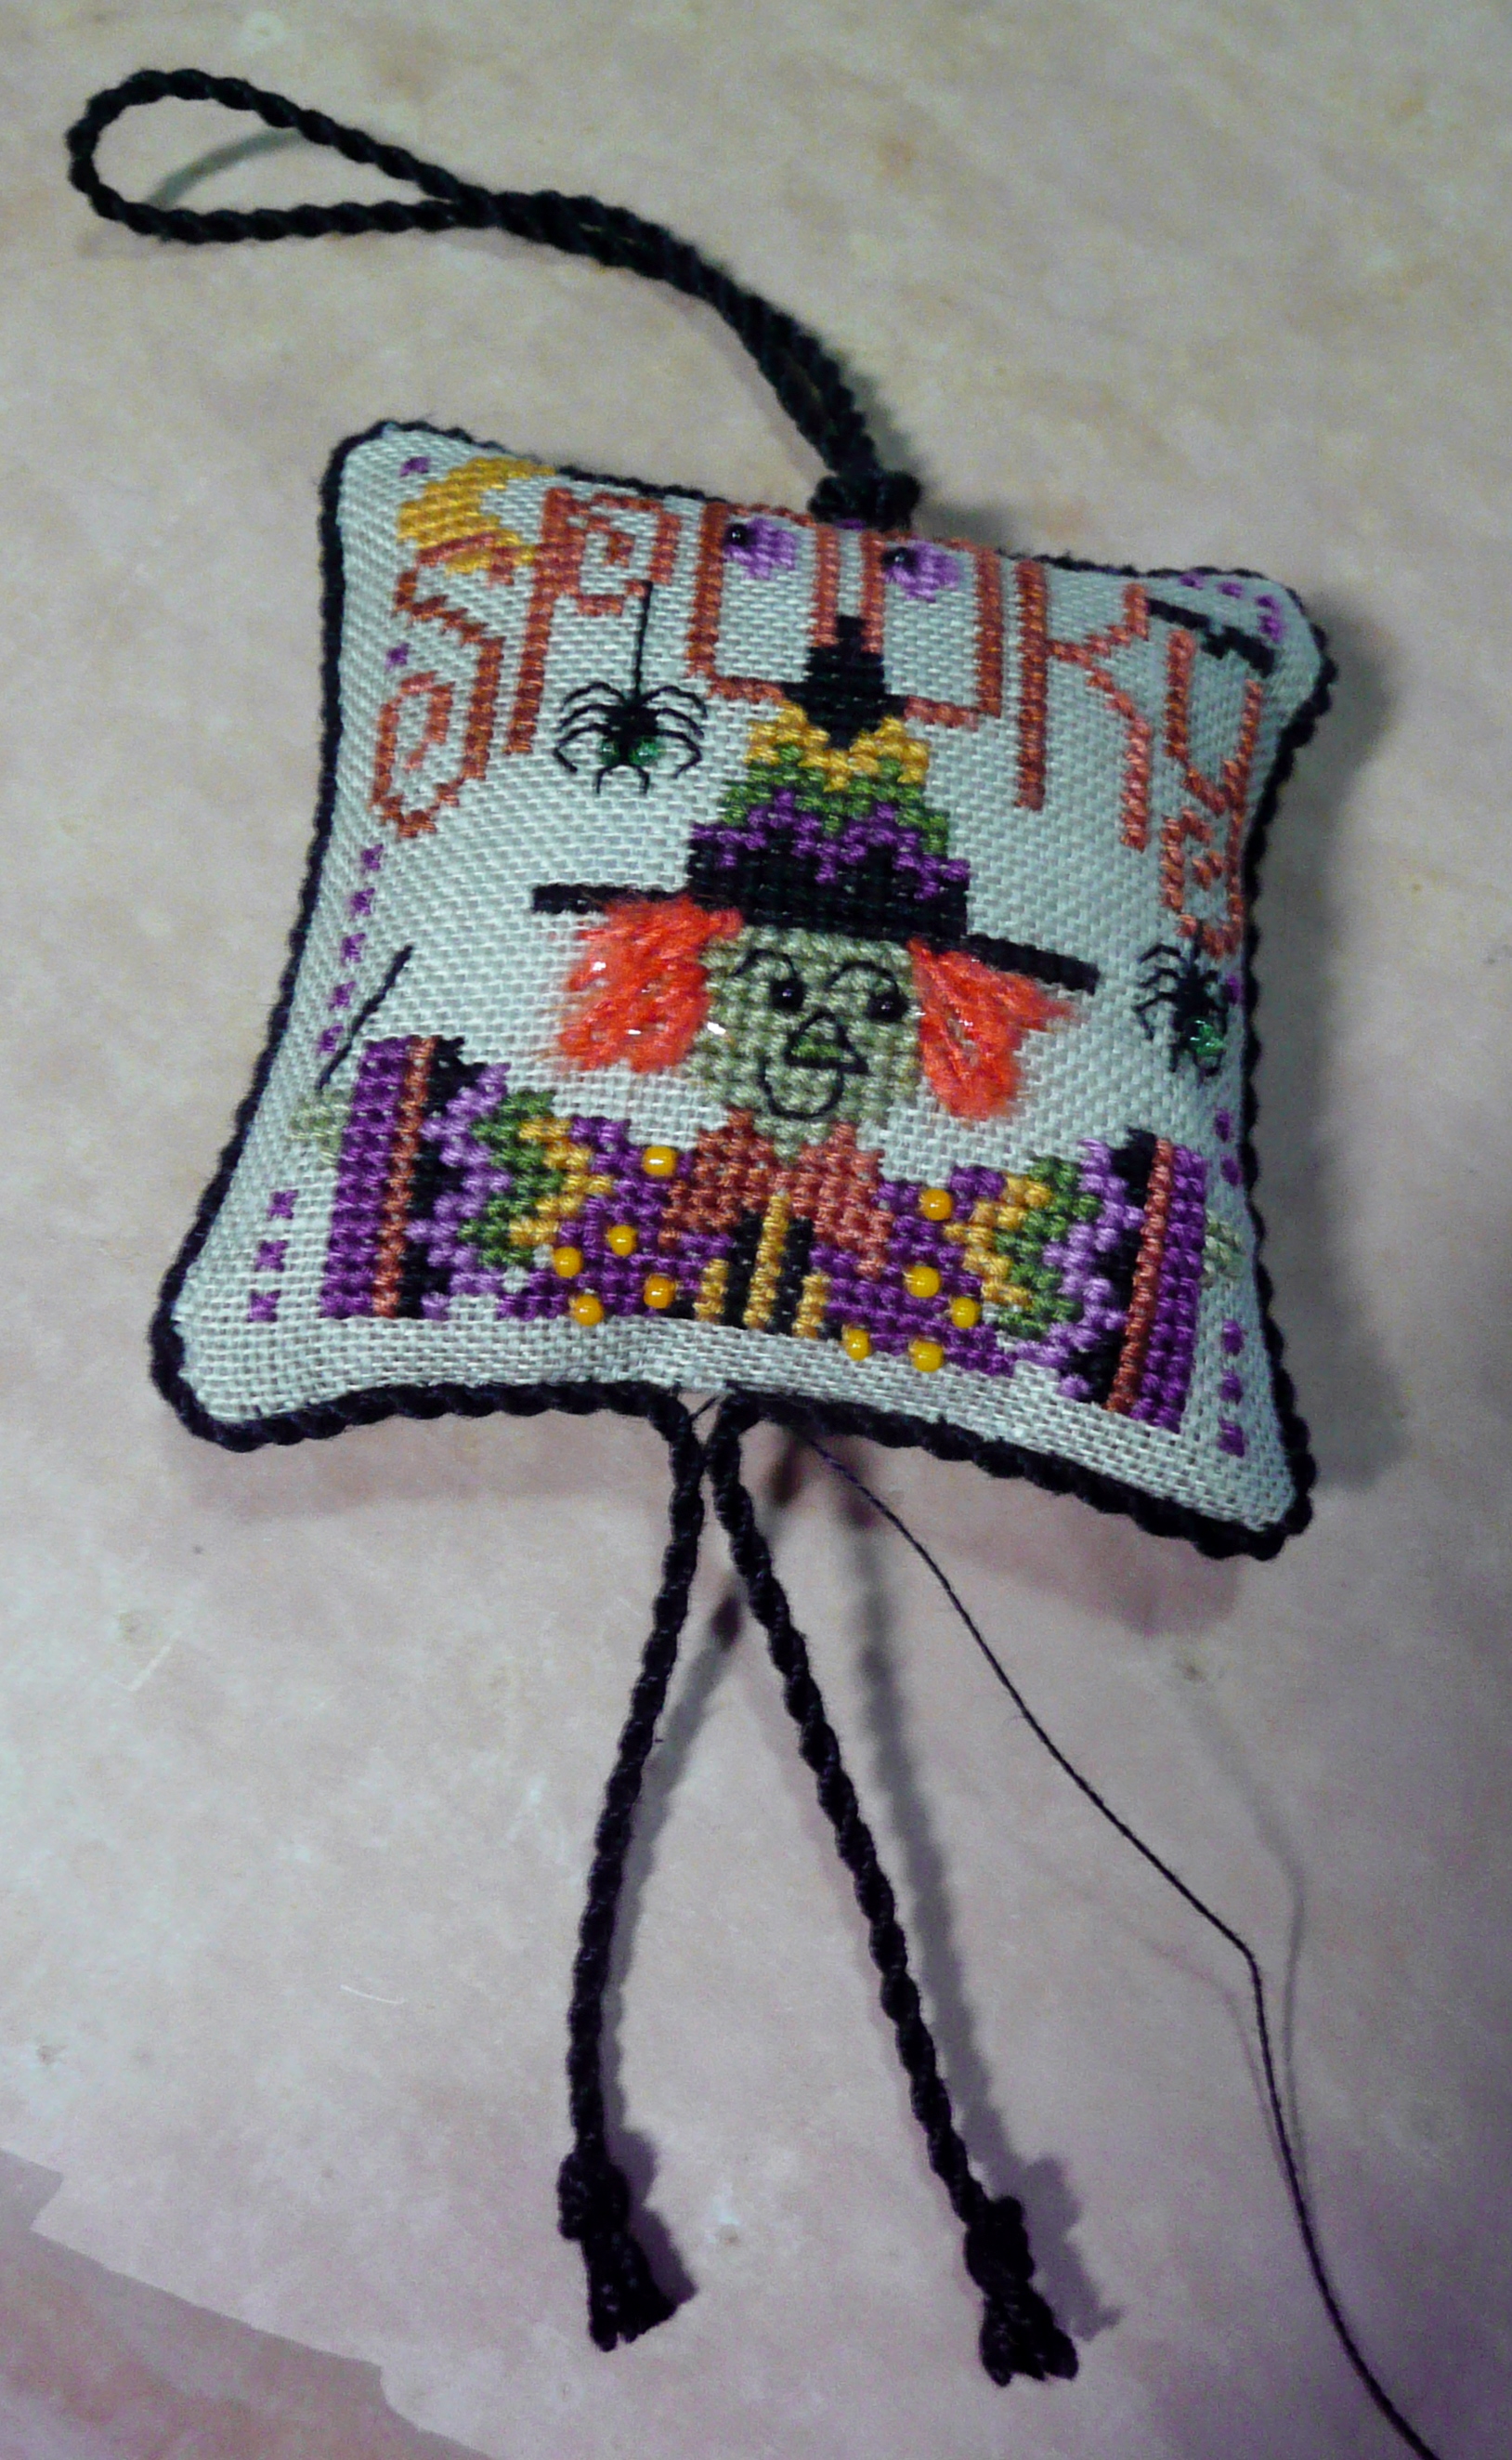


Lucky last, I pop a quick knot at the base of the pillow, and the scissor fob is finished 🙂 If you find your cording is too long, just make another knot at your desired length of each piece of cord, and cut off any extra length not required.

10. All that is left is to attach your fob to your chosen pair of scissors!
I hope you have found the tutorial useful – if you happen to use any of the information I’d love to see your projects where you have used them 🙂
Kindest regards,


I love the way this turned out. I can definitely see me using this one in my future…thanks for the instructions and congratulations on a fantastic job!
Thanks so much Sue – I’d love to see your finished article once you give the technique a try! 😀
Thank you Anne for this great tutorial!
Thanks again Carolyn for your kind words! 🙂
Thank you for sharing . This tutorial is extremely helpful 😊