Pin Pillow Tutorial #2

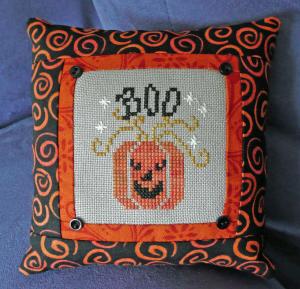
Here is the 2nd pillow tutorial resulting from my finishing spree last weekend:

2419601140047689748jZxxnJ_fs

You will need:

  • Stitching for the centre of the cushion
  • Coordinating fabric(s) for side strips and backing
  • Sewing machine with coordinating sewing machine thread to match your fabric(s)
  • Scissors/rotary cutter and mat
  • Pins
  • Embellishments (optional)
  • Polyfil stuffing (or something similar)
  • Sewing needle and thread to close up the seam opening

2958031650047689748tuaVfJ_fs

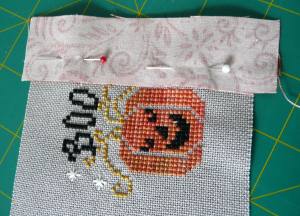
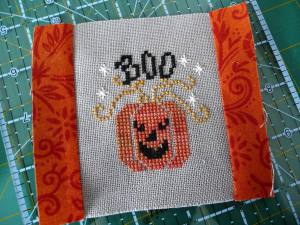
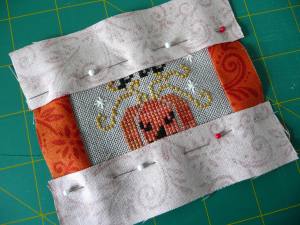
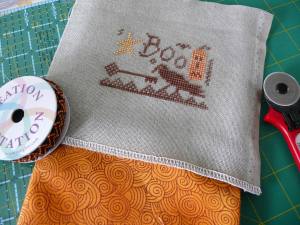
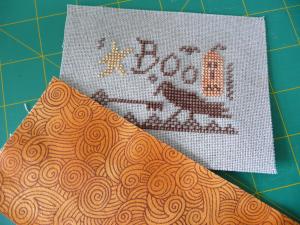
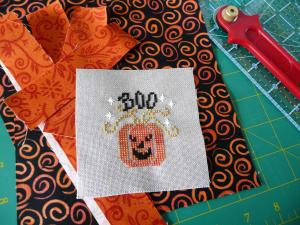
1. First of all cut your coordinating fabric into equal width strips, and approximate width of your sewing project. In my case I have chosen to have two different fabrics on the front of my pillow, and have started with a narrow strip of bright rust fabric for the inner border.

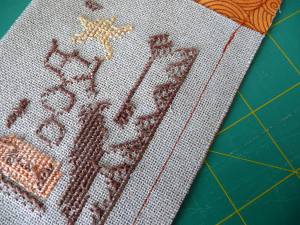
Pin the first strip with right sides facing to your stitching (I prefer to start with the pieces attached to the left and right sides, but you may prefer to start with the top and bottom sections first), and stitch a normal seam allowance (alternatively you may prefer to just a quilters 1/4″ seam).

2407215140047689748FTMiqW_fs

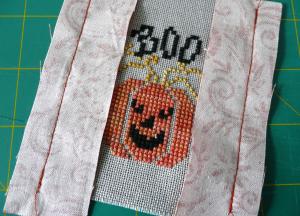
Once you have stitched the first seam, attach the 2nd strip of fabric to the opposite side of your stitching and stitch another seam.

2690648670047689748CoJOoe_fs

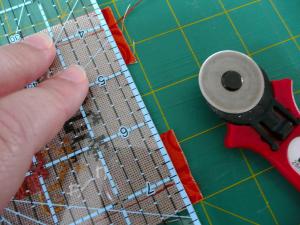
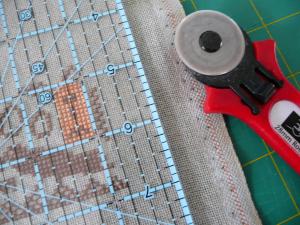
2. At this point I cut off my excess fabrics on each side, and trim my seams to 1/4″ – I usually prefer to do this because I don’t trust myself to get things right the first time!

2099746380047689748GPoFiR_fs

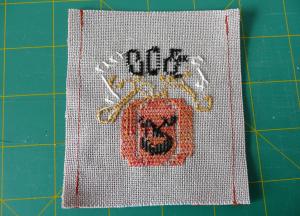
3. You finish with nice tidy edges, ready to attach the last two sides of fabric.

2657349570047689748aUuYib_fs

4. Before we do that, though, we need to open the fabric sides up and give them a quick press with the iron so that they sit nicely. If you want to you can also do a row of top-stitching to assist with holding the fabric nicely, but I don’t normally bother.

2299624430047689748yeaHrN_fs


2638518820047689748YLkpwC_fs

5. Now we attach the top and bottom sides in exactly the same way as we did with the first two sides. Once all sides have finished, I normally check the side strips to ensure they’re nice and tidy and even, and if not I give them a quick trim all round with the rotary cutter.

2911215730047689748nUaGTK_fs

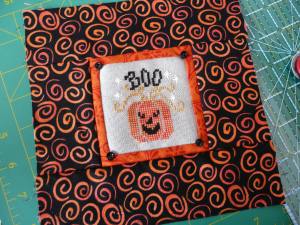
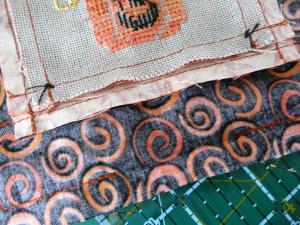
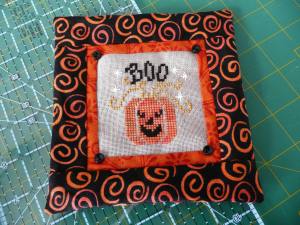
6. In my case I decided to just have a narrow strip of bright rust fabric as a contrasting focal point, then added some wider strips of fabric for the outside edges. These are attached in exactly the same way as the rust strips, they are just cut into wider pieces. You just need to remember to add the next lot of strips in the same order as you did previously, which was in my case left and right first, followed by top and bottom. Once I had ironed my finished strips I decided that little buttons would be nice in the corners, so I added these before adding the backing fabric.

2123196290047689748RjcOVt_fs

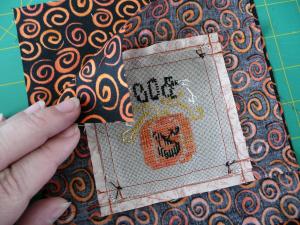
7. Now you need to cut your backing fabric the same size as your finished article, and pin them together with right sides facing together (the right side of the stitching will be on the inside of the sandwich).

2988301120047689748lgAgCE_fs

8. Stitch a seam allowance around the edges, but leave an opening at the bottom so that you can turn your pillow inside-out. I tend to leave about 1 1/2″ opening and that’s normally enough room to allow for turning.

2435833260047689748arated_fs

9. I use a chopstick to help push the corners into a nice shape from the outside – you just have to be careful not to force the seam stitching too much! Once you have turned your pillow inside out, it should look something like this. Now all you have to do is stuff it to your preferred thickness with your favourite stuffing.

2251500190047689748icYwpz_fs

10. I close my pillow openings with a ladder stitch – and the following is taken from a previous Christmas ornament tutorial, but is the exact same instruction for closing the pillows.

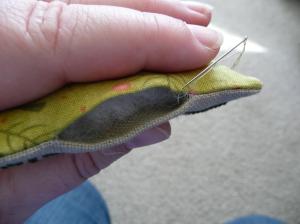
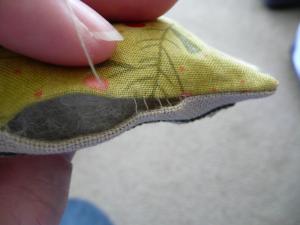
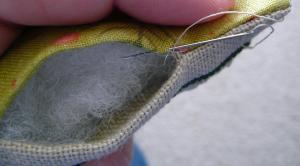
As you can see from the photo below, I start off by slipping my needle into the seam of the backing fabric, then coming back out about 1/4″ along the seam (about 3mm) and bring my needle out.

SimplePillowOrnie23

I then take my needle directly opposite where I just came out of the backing fabric and slip my needle into the linen and follow the seam along for about 3mm and bring the needle back out again.

2194773970047689748yTwcdd_fs

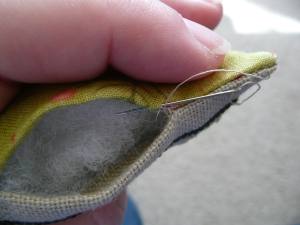
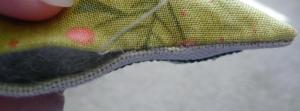
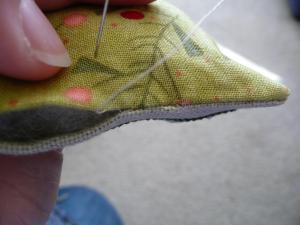
I’ve left the stitches nice and loose in the photo below to help illustrate how the stitches follow along opposite each other, like rungs of a ladder.

2262966270047689748zIRkfV_fs

When you pull the thread tighter, the stitches almost disappear into the fabric, giving a really nice clean finish – this is definitely my favourite stitch for closing up openings for that reason!

2648772410047689748VxlgxN_fs

Once you reach the end of the seam opening, you need to finish off your thread with a couple of teeny stitches – I then bury the needle into the seam and come out somewhere about an inch way and bring the needle back out again – then clip the thread close to the fabric so that my thread tail does’t appear easily.

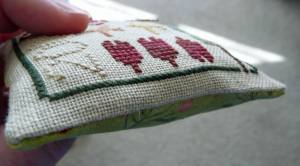
And here’s the final seam all finished off – see now nice and tidy that ladder stitch is in the opening? :D

2761840410047689748NKnzRz_fs

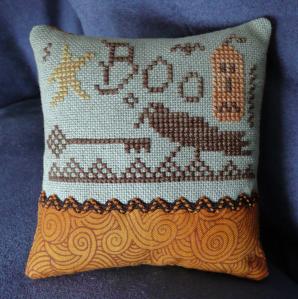
11. And that is the final step in your beautiful new pin pillow coming to life. Now all you need to do is to find somewhere to display it where it can be admired by everyone 😀

2419601140047689748jZxxnJ_fs

Pin Pillow Tutorial #1

Here is a pin pillow tutorial that I put together during a day of finishing last weekend – I finally managed to sit down and put the instructions together today.

2698291120047689748GdtJUD_fs

You will need:

  • Stitching for the centre of the cushion
  • Coordinating fabric(s) for side strips and backing
  • Sewing machine with coordinating sewing machine thread to match your fabric(s)
  • Scissors/rotary cutter and mat
  • Pins
  • Ribbon/lace/button embellishments (optional)
  • Polyfil stuffing (or something similar)
  • Sewing needle and thread to close up the seam opening

2027097940047689748Zulokh_fs

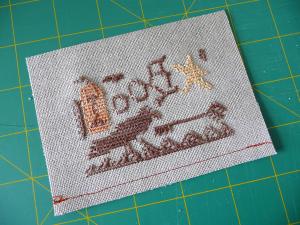
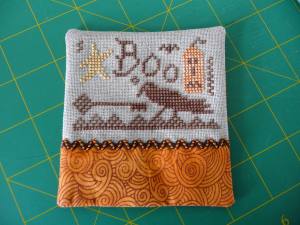
1. First of all trim your stitched piece, and cut your coordinating fabric to your preferred length and the approximate width of your sewing project. In my case I have chosen to have my coordinating fabric at the bottom of my stitched piece, and I prefer to have the quilting fabric slightly smaller than my stitched piece so it doesn’t take too much attention from the stitching – I have, however, seen some stunning pillows with the stitching taking up just a small amount of room at the top of the pillow. The only difference is down to your preference, as the finishing process is exactly the same.

2685694720047689748YcqtfO_fs


2021272760047689748lkYwGz_fs

2. Pin the fabrics together, with right sides facing, and stitch a normal seam allowance (alternatively you may prefer to just a quilters 1/4″ seam).

2277268790047689748nJhnUL_fs

3. At this point I cut off my excess fabrics on each side, and trim my seams to 1/4″. This is also the time when you should open up the seam(s) and give a quick pressing with the iron.

2375897360047689748bJJBWs_fs

4. If you have decided to have fabric on both sides of your stitching (either top and bottom, or left and right) this you will need to repeat the above process a second time for the additional piece of fabric. Once you’ve finished attaching the coordinating fabrics, check the edges to ensure they’re all even, and give it a quick trim with the rotary cutter if needed.

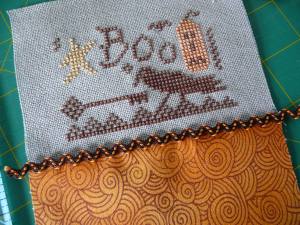
5. At this point I add any seam embellishments to the pillow front. For this particular pillow I just wanted to add one row of matching ric-a-rac. This can either be attached by the sewing machine or by hand (I ended up adding this one by hand, as I didn’t have a matching brown sewing machine thread). This is also a good time to add any buttons or other trims you want to add, prior to constructing the pillow itself. Alternatively, you can add your ribbon at the very end once the pillow is finished, but just wrapping it around the pillow and tying a bow to hold it in place 🙂

2642088720047689748bRDPgO_fs

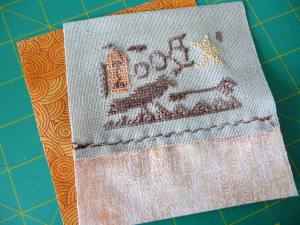
6. Now you need to cut your backing fabric the same size as your finished article, and pin them together with right sides facing together (the right side of the stitching will be on the inside of the sandwich).

2374733320047689748wTwZkx_fs

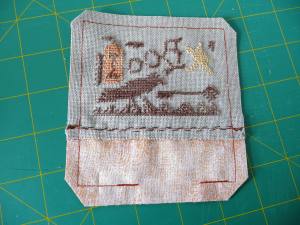
7. Stitch a seam allowance around the edges, but leave an opening at the bottom so that you can turn your pillow inside-out. I tend to leave about 1 1/2″ opening and that’s normally enough room to allow for turning.

2677311630047689748GXjCzq_fs

8. I use a chopstick to help push the corners into a nice shape from the outside – you just have to be careful not to force the seam stitching too much! Once you have turned your pillow inside out, it should look something like this. Now all you have to do is stuff it to your preferred thickness with your favourite stuffing.

2211549530047689748YhZOXR_fs

9. I close my pillow openings with a ladder stitch – and the following is taken from a previous Christmas ornament tutorial, but is the exact same instruction for closing the pillows.

You need to thread your sewing needle with sewing thread (if you didn’t leave a long tail from the seam stitching). You should use a sharp needle here, not a tapestry needle, so that you can pierce the backing fabric easily.

As you can see from the photo below, I start off by slipping my needle into the seam of the backing fabric, then coming back out about 1/4″ along the seam (about 3mm) and bring my needle out.

SimplePillowOrnie23

I then take my needle directly opposite where I just came out of the backing fabric and slip my needle into the linen and follow the seam along for about 3mm and bring the needle back out again.

2476698410047689748jTLefH_fs

I’ve left the stitches nice and loose in the photo below to help illustrate how the stitches follow along opposite each other, like rungs of a ladder.

2262966270047689748zIRkfV_fs

When you pull the thread tighter, the stitches almost disappear into the fabric, giving a really nice clean finish – this is definitely my favourite stitch for closing up openings for that reason!

2122000840047689748JZSJVl_fs

Once you reach the end of the seam opening, you need to finish off your thread with a couple of teeny stitches – I then bury the needle into the seam and come out somewhere about an inch way and bring the needle back out again – then clip the thread close to the fabric so that my thread tail does’t appear easily.

And here’s the final seam all finished off – see now nice and tidy that ladder stitch is in the opening? :D

2761840410047689748NKnzRz_fs

10. And that is the final step in your beautiful new pin pillow coming to life. Now all you need to do is to find somewhere to display it where it can be admired by everyone 😀
2698291120047689748GdtJUD_fs

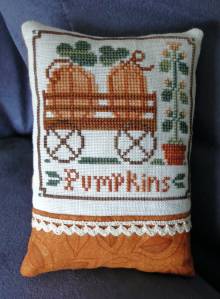
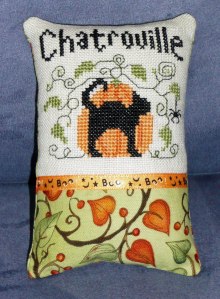
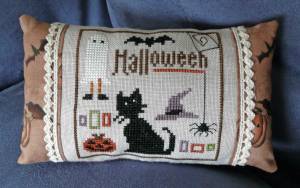
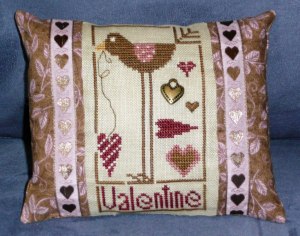
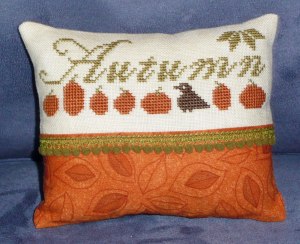
Following are some additional pillows I have finished in the same way – isn’t it amazing how such a simple finishing method can look so different depending on the choice of fabrics and embellishments?
Pumpkins-pillow Chatrouille-pillow Halloween-pillow P1030899 Valentine-pillow Autumn-pillow

Tuck Pillow Tutorial

Welcome to our tuck pillow tutorial. This tutorial will be for a 7″ flat door hanger tuck pillow but you can make yours any size you like. Smaller tuck pillows are good for Christmas ornaments. To recap, following is a list of what you need to make the pillow.

  • your stitched piece
  • main fabric for pillow – a fat quarter will be plenty
  • neutral fabric for back of opening – a scrap piece the size of your pillow. I use calico/quilters muslin/homespun or whatever it’s called in your country.
  • fusible fleece wadding – the width of your pillow. I use fusible fleece on my pillows as I prefer the finish it gives to the back of the pillow. You can, of course, use any batting you prefer. Something not too thick is best.
  • cord for hanging
  • sewing machine
  • thread

Cut 1 piece of main fabric 7½” by 7½” for the back

Cut 1 piece of neutral fabric the same size

Cut 1 piece of fusible fleece the same size

Cut 4 strips of main fabric 7½” by 2½”

Fuse the fleece onto the wrong side of the main fabric piece – this piece will form the back of the pillow. I always use a pressing cloth for this step. If you are using a non-fusible batting, pin the batting to the wrong side of the main fabric piece & sew using a ¼” seam. Now treat this piece as one.

Fold the 4 strips of main fabric lengthwise, wrong sides together. Press.


Place 2 of the strips onto the top and bottom of the right side of the back pillow piece, raw edges together (the folded edge will be in the middle) & pin.

Place the other 2 strips on the sides of the right side of the main piece & pin. Do not sew yet!

At this time, you will add your hanger. First of all you need to ascertain which edge is the top of your pillow (this is only crucial if your pillow is rectangular or the fabric strips/main fabric have a one way design). Pin your cording piece between the strips and the main fabric piece making sure the cording loop is in the middle of the pillow, NOT poking out through the seam – the ends WILL be poking out of the seam and will be trimmed later (see pic for clarification).

Now sew all these pieces together using a ¼” seam. To ensure the cording stays put, you can backstitch over this part or sew that part of the seam again to reinforce it.

Place the neutral fabric and main pillow piece right sides together with the strips sandwiched in the middle and pin.

Now sew these seams using a ¼” seam, leaving an opening for turning. Trim the seams, corners & cording.

Now turn the pillow right side out and VOILA, your very own tuck pillow!

You may, if you wish, whip stitch the opening (which will now be situated inside the pillow) closed. However, I usually just leave it as no one can see it. Give the pillow a good press to make it nice and flat.

Now you can add your finished cross-stitch piece which, hopefully, will fit into the opening. You can secure it with buttons at the corners or just leave it. I find that the stitched piece doesn’t move much unless the cat gets at it & gives it a bat!

Calculating other sizes of pillows

To calculate a different pillow size, all you need to do is measure your finished cross stitch piece and add 1½” to all sides. That measurement will be your main fabric and batting size and strip length. The width of the strips will be 2½”.

Keep in mind that the larger you make your pillow, the wider the strips should be. This, in turn, will also affect the size of the opening so double check that your stitched piece will fit!

Tuck Pillow Tutorial

Next weekend will be our tutorial on making tuck pillows.  Tuck pillows are very versatile. They can be stuffed like a pillow or left flat. They can be used for Christmas ornaments and hung on a tree, or used as a door hanger. This tuck pillow tutorial will be for a flat door hanger about 7″ square. Instructions to calculate other sizes will be included in the tutorial.

You will need:

  • Your stitched piece (duh!)
  • Fabric for your pillow – a fat quarter should be plenty unless you’re making something bigger than 9″
  • Scrap of neutral fabric for the back of the opening – calico, muslin, homespun
  • Fusible fleece wadding – same size as your pillow. You can use a non-fusible batting if you prefer. Something not too thick is best.
  • Cord for hanging
  • Sewing Machine
  • Thread/scissors etc

I’ll be back next weekend with the tutorial!

Tie on Pillow

Merci PillowHello all, I’m a relatively new finisher and I was easily able to complete this tie-on pillow for Karen V using her excellent tutorial (found here). If you haven’t tried one of these yet, why not give it a go? Thanks to Karen and Anne for making these resources so accessible.

–Rachel V. (Willing Hands)