Scissor Fob #3 (with whip-stitch edging)

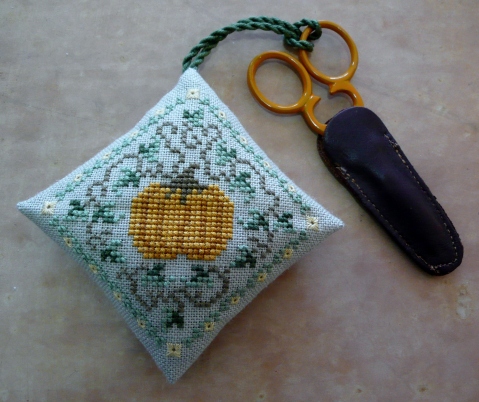
This tutorial is the next in my list of the many ways you can finish a scissor fob. The whip-stitched edge is one of the most versatile ways to attach two stitched pieces of fabric together, and is the perfect stitch for finishing scissor fobs. The next tutorial will include a beaded edge and tassel … so watch this space for that one … and in the meantime I hope you find the below tutorial of use. As always if there is something that is unclear or you have any questions don’t hesitate to scream out!

Scissor Fob with whip-stitch edging
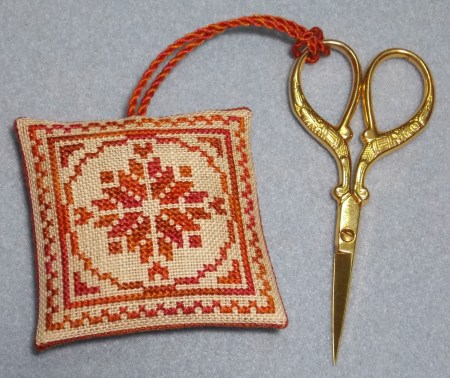
DSCN0404

You will need:

  • Stitching (identical size front and back)
  • Cording or ribbon for the hanger
  • Matching cotton floss for the whip-stitching
  • Your choice of filling (eg polyfil, teddy bear pellets, etc)

1. Firstly you need a back-stitched line of stitching outside your stitched pieces, both front and back. The stitching must be identical in size on both the pieces, so make sure you count very very carefully, or your sides won’t match when you whip-stitch the sides together. In most cases I stitch approx 2 stitches away from my main stitching (ie 4 threads away on linen and 2 squares away on aida fabric).

DSCN0372

2. Cut away the excess fabric from each piece, leaving approx 3/4 to 1cm seam allowance.

DSCN0373

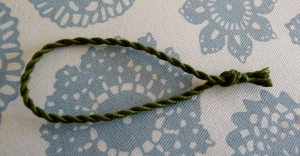
3. At this point I realised I hadn’t yet made myself a piece of cord, so I nipped off to quickly put a piece of cord together … see the previous tutorial for making your own cord. Alternatively you can use a piece of ribbon with the ends knotted together in the same way as the cord below.

DSCN0374

4. Now we need to turn over the seam allowance of your stitched pieces. First of all I fold over the corners right at the hole of the corner stitches of the back-stitched line.

DSCN0375

Then fold over the seam itself along the back-stitched line of stitches.

DSCN0377

DSCN0378

Continue all the way around until all the edges are folded over. You may prefer to hold down the seams with a pin – if you do this, though, don’t forget to pin it from the right side so you don’t accidentally stitch your pins on the inside of the fob!

DSCN0381

DSCN0382

DSCN0383

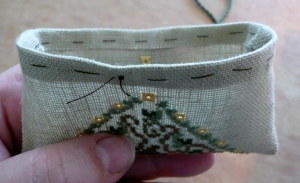
5. Now we start to back-stitch around the fob and stitch the front and back pieces together. I usually use 2 strands of cotton floss for my edges. Note that I have used a contrasting thread here so that the stitches show up more clearly – you can choose to do this if you want to have a contrast of the threads, but normally I prefer to use a complimentary thread colour to the fob, and usually use the same colour for the back-stitched seam lines and for the whip-stitching.

Start by coming up with your needle in the corner hole of one of the back-stitched lines.  I usually cheat and use a small knot to anchor my thread in the seam allowance.

DSCN0387

DSCN0389

Then take your needle under one of the back-stitches – start with the first stitch on each side.
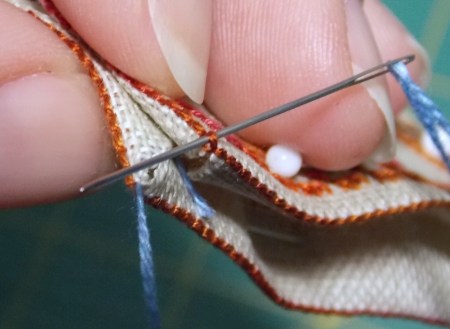
DSCN0391

And continue to take it under the stitch that is directly opposite on the other piece of fabric (once again the first stitch on that side of the fabric).

DSCN0392

Then come back to the first piece of fabric, and take your needle under the next stitch and once again underneath the stitch directly opposite.

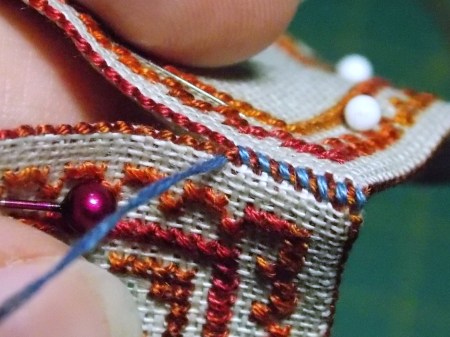
DSCN0393

DSCN0394

You continue this way until you come to a point where you want to attach your fob hanger. In this case I could have made my fob to hang in a diamond shape, or in a square shape … I ended up deciding on the square shape this time round.
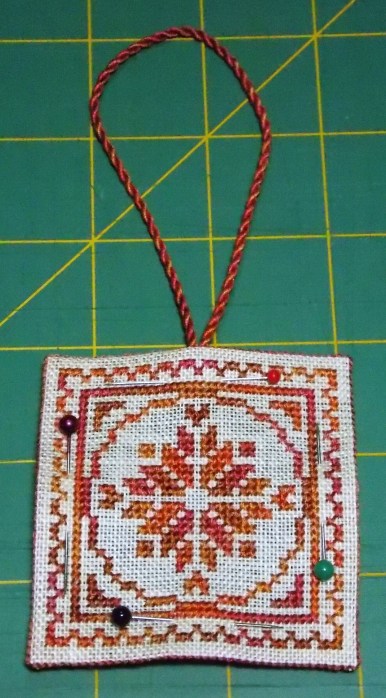
DSCN0385

DSCN0386

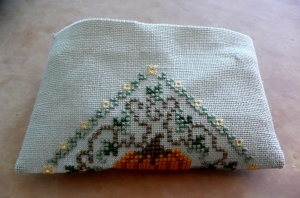
To do this I continued whip-stitching the seam until I almost came to the half-way point across one of the sides – then I inserted the knot of the cord into the seam.

DSCN0395

DSCN0396

DSCN0397

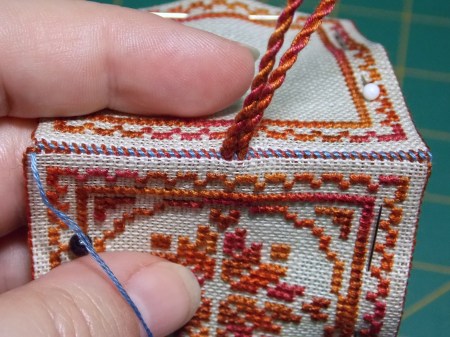
Continue to whip-stitch through each side of stitches, but for the next two stitches you’ll need to pass your needle through the centre of the cord as you stitch – this will ensure that your cord doesn’t come free and helps to cement it neatly in place.

DSCN0398

DSCN0399

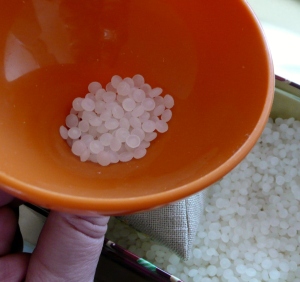
6. Continue to whip-stitch all the way around 3 of the sides, then leave a small opening on the 4th side so you can insert the filling of your choice. In my case I’ve used my favourite choice, teddy bear pellets.  (You will see that I’ve now started using the ‘proper’ coloured thread now to complete the finishing.)

DSCN0400

Once you have filled to your desired level, continue to finish off the remaining stitches.

DSCN0402

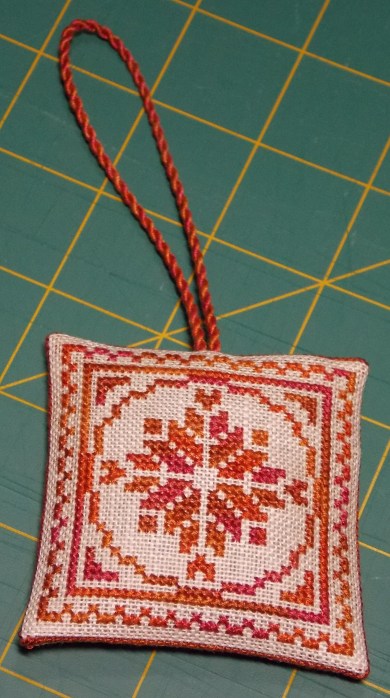
Finish off your thread at the end, and voila, your fob is all finished!!
DSCN0403

I hope you enjoyed the latest tutorial – thanks again for your previous comments on the other tutorials, it helps the motivation to keep doing more! 🙂

Scissor Fob Tutorial #1

Note, this post is the property of myself – please DO NOT re-blog any of the content without express written permission by this blog owner (Anne), thanks.

j0439073

This is the first of a number of upcoming Scissor Fob tutorials … and is the type of finishing used by The Drawn Thread freebie designs and similar to Mill Hill treasure ornament series.  The finish is a diamond shape, which I think is really attractive for a scissor fob.  This one in my tutorial is a bit large for a scissor fob, in my opinion, but the finishing is the same irrespective of the design size you choose 🙂  If you are interested, this is Pumpkin Keeper freebie by The Drawn Thread.

P1060957

Materials needed:

  • Stitched project – this needs to be a square design, preferably stitched in a diamond shape
  • DMC thread or sewing machine thread to match the stitching fabric (and contrasting sewing machine thread for basting, if desired)
  • Stuffing (your preferred choice, can be Polyfil, crushed walnut shells, or teddy bear pellets, for example)
  • DMC for cording, or ready-made cord
  • Pencil or cording drill

1.  Ensure you have equal sides on your stitching – the easiest way to do this is to count the number of squares away from each of your piece if stitched on aida, or count a specified number of threads away from each side when stitching on linen.  In this case I followed the Drawn Thread instructions, which was to count out 24 threads away from the stitched area and cut off the fabric edges.  I find the easiest way to do this is to count out your designated number of threads then remove the next thread, ie pull it all the way out – this leaves a clean channel for cutting a straight line following the weave of the linen, as you can see in the photo below.

P1040636

P1040636

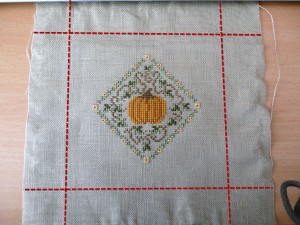
2.  Once you have cut away your edges and have a nice square piece of fabric, fold your stitching in half across the centre of the design, with the right side of the stitching facing each other.  Pin the edges together, and stitch a seam allowance at each of the short edges.  As it is hard to see my thread on the fabric, I have highlighted with red stitching where the seam line is below.

P1060927

P1060927a

I usually prefer top snip the corners slightly to make them easier to make ‘points’ once they’re turned the right-side-out.  If you do this, make sure you don’t snip them too close to the seam line, or it will unravel, and you don’t want that!

P1060928

3.  Now turn your stitched piece inside out, and put out the corners – sometimes I use a pointed chopstick to help get a nice point in the corner, but this needs to be done gently so you don’t poke a hole in the fabric!

P1060930 P1060931

4.  Next we turn over the seam allowance on the top raw edges.  I prefer to give the seam a quick iron to make it sit flat.  You can just pin the seam allowance down around the top, or do as I do which is to baste it down using a contrasting sewing machine thread.

P1060932 P1060933 P1060935

5.  Next bring the two seams together to meet in the centre, and your stitching is in a diamond shape.  I usually pop a couple of pins in temporarily to hold the seams in place.  Turn your piece over to work out which is the top of your stitching, and where the cord will eventually be attached.  In this tutorial, because the fob is so big I’ve decided to just have a cord hanger at the top without any tassel or embellishments at the bottom – another tutorial will cover the option of adding tassels to your fob later.

P1060936 P1060938

6.  Next it’s time to make your cord – obviously if you have purchased ready-made cord you can omit this step, but ensure your purchased cord is quite narrow so you can knot the ends easily.  I made my cord out of DMC cotton floss, and because of the size of the fob I opted to use 4 strands of DMC for my cord as I wanted it to be a bit thicker (my preference is usually 3 strands of either DMC or pearl cotton).  Sometimes it’s trial and error as to how thick the cord will turn out.  It is generally much easier to have another person assist you in making cord, but as I’m on my own I have to improvise with whatever is handy!  I apologise in advance for the poor photos in this section, I will do another tutorial soon to show the steps more clearly …

The first thing to do is to knot each end of the group of threads together.

P1060894

P1060898

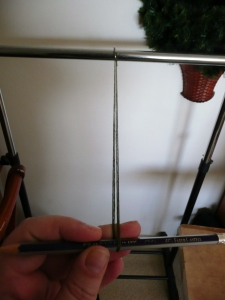
Next you need to rope in an assistance to help out by holding one end of the threads tightly, or do what I do by finding something you can attach the other end to … in my case I have a portable clothes rack that I used, by snapping a metal ring over the rail and hooking the ring through the middle of the threads at the knot end.  Alternatively you could tie the end around a door handle or something similar.

P1060899

If you have a cord drill, that’s perfect, otherwise you can make do by using a simple pencil to wind the thread.  Take your pencil and insert it through the middle of the remaining end of the thread (at the knotted end), and walk back until your thread is nice and straight.  Then start turning your pencil – it doesn’t matter in which direction you turn your pencil, as long as you continue to turn it the same way 😉  I prefer to use a cord drill as it’s so much quicker, so that’s how I finished my cord off this time round.

P1060900 P1060901 P1060911

You need to keep turning your pencil/cord drill until your threads are very taut.  If you slacken off your tension a little bit and your thread starts to ‘kink’ and turn on itself it’s generally twisted enough.  I let go of the tension a little bit here so I can hopefully show you what I mean about the ‘kinking’ of the thread.

P1060913 P1060915 P1060917

This next part is very tricky to photograph as I needed both hands …  Once your thread is twisted enough, carefully hold the middle of your twisted thread with one hand, then using your other hand bring the two knotted ends together.

P1060918 P1060921

I usually use a self-made weight that I hang in the middle, but forgot to use it this time!  I’ll show that method another time, as it’s a really quick way to get the threads twisting onto themselves!  In this case, however, I just used my left hand (my right hand was still holding the two ends together) to slide up the thread about an inch, and using my thumb and forefinger gave the threads a gentle twist.  You continue to do that by working up the thread and helping the threads twice nicely onto themselves.  Eventually you end up with a beautifully twisted cord.  Then you finish off by knotting the two loose ends together so it doesn’t unravel.  And voilà your cord is finished!! 😀

P1060923 P1060924

7.  Decide how long you want your cord to be – generally 3 1/2 to 4 inches is about the right length, but you may prefer to have your hanger longer than that – it’s all personal preference!  In this case I’d made my cord quite short so I could do the tutorial easier for you.  Knot the two loose ends together at your desired length.

P1060925

8.  Now it’s time to pick up your stitching once again, and we need to start stitching up the remaining seam.  My preference is to close it up using a ladder stitch, however you can use a whip-stitch if that is easier for you.  Start at the bottom of the fob, away from where the cord will be inserted.  To do a ladder stitch you just work your way alternatively up each side of the seam, taking a few threads in your needle for each stitch – this looks like the rungs of a ladder when the stitches are loose, and when you pull them tight they close up the seam very cleanly.  Keep stitching up the seam until approx 1″ away from the end.

P1060942 P1060944 P1060946

9.  At this point you insert your chosen stuffing.  I have opted to use teddy bear pellets for mine, as I really like the extra weight it gives the fob, especially for smaller fobs (in hindsight I probably should have used Polyfil for one this big!!).  When I stuff with pellets I use a little Tupperware funnel that I find really useful for this job – alternatively you can roll a piece of stiff paper into a funnel instead!

P1060947 P1060948

10.  Now we’re on the homeward stretch, and it’s time to add the cord and close up the seam!  Take your cord, and place the knot inside the seam opening, then continue stitching up the opening to the top.  Sometimes I will take my thread through the cord at the top to stop it from moving around, but it wasn’t needed for my fob this time.  You can now remove all your basting stitches.

P1060953

And that’s it, your fob is all finished and ready to adorn your chosen pair of scissors!!

P1060956

As always, please feel free to leave comments and let me know if you have any questions.  It’s always good to know if you find the tutorials useful, or if there is something you would like to see more of, so the comments are always appreciated!

Kindest regards,

Scissor Fobs Galore!

There are numerous ways to make up a stitched scissor fob, so over the next while I’m going to show a few different techniques to put fobs together.  Some will use cording for the ‘hanger’ while others will use ribbon, some will use stuffing while others will be flat, and some will be large while others will be tiny, some have side seams while others have seams down the back … hopefully you will enjoy the next few months while I try out some new finishing methods and share the results with you.

I also attempted to make a cord tutorial yesterday, which wasn’t greatly successful as I was trying to do it on my own … you know how difficult it can be to make cording itself with just one pair of hands, well adding the juggling of a camera at the same time gave it an entirely new challenge!  I’ll be visiting my parents over the next couple of weeks for a home visit, so I’ll try to rope my Mum into assisting me getting a clearer tutorial put together.

In the meantime I will shortly upload the first fob tutorial of the series – please feel free to ask questions if my instructions don’t make sense, or leave feedback if there is a particular type of finish you would like to see published.

Kindest wishes,

Stawberry fob finishing

Summer Quaker Strawberry for Amy in SC
Hello all,

I’m running a bit late this month but have finally cobbled together some photos and text for Strawberry fob finishing.

First gather your equipment…

first gather your equipment
For this project you will need:

  • Stitched project – some suggestions: Prairie Schooler chart 100 – American Strawberries & chart 101- Prairie Strawberries (used for this tutorial), Anita’s little Stitches designs, Blackbird Designs – there is a strawberry fob in the Secret Garden pattern (OOP) from the Loose Feathers series of 2006 and a Blackbird Designs also designed a fabulous quaker strawberry for the 2006 Annual Just Cross Stitch Christmas Ornaments issue (I’m sure this one is still available).
  • Interfacing
  • Ribbon, felt
  • Stuffing
  • Scissors, needle, thread, pins.
  • Iron

And you can see in this photo, I also made sure I had a cup of tea to work with.
Iron on the interfacing on the reverse side of your stitching
Take your stitched piece and iron a piece of interfacing to the reverse of the stitching.
pin the template on and cut around
Make a semi-circle template, pin to the stitching and cut around. You can see I have mucked up centering this up with the “quiltish” strawberry above – this is not really a problem for this finishing technique.
fold and finger press the straight seam
Next, finger-press a small seam along the straight edge. Make this seam as close to the stitching as possible.
use a ladder stitch to join the straight seams
Fold the semi-circle to form a cone (see above). Stitch the straight seams together. I like to use a ladder stitch to do this, but you can use a sewing machine if you wish (I find it is easier to do this by hand).

you might be able to make out the ladder stitch from this photo
I kinda hoped you’d be able to see the ladder stitch in this photo. If you pull it nice and tight it disappears into the seam. I’m pretty pleased with the join for this strawberry.

run a gathering stitch around the edge of the cone shape
If you used the ladder stitch to join the seam, secure the thread and then run a gathering stitch around the top of the cone around 1/2 an inch from the top.

add stuffing and pull the running stitch gather.
Draw the gathers together a little and stuff your strawberry – I’ve used hobbyfill.

gathering the top of the strawberry
Draw the gathers tighter and run a few stitches across the “opening” and pull these tight to secure your thread. You can insert a hanger at this point if you wish, stitch through it as you secure your thread.

Top of the strawberry with felt cap in place, tacked down.

For my first strawberry, I’ve attached a felt cap. I cut the felt out using the template in the pattern (Prairie Schooler pattern 101: Prairie Strawberries) and tacked it to the strawberry.

sewind down the felt cap

Next, I stitched around the felt using a buttonhole stitch – making sure I caught the linen beneath. Then I attached the second felt star (template from the prairie schooler pattern) using buttonhole stitch.

felt wool cap all complete

Attach a hanger to the top. I made a loop of ribbon and secured with tiny tacking stitches and slipped a bead over the ribbon to hide the stitches.

Another pretty way to finish the strawberry is to tie ribbons around the hanger – I learned this technique from Janie Hubble from The Cat’s Whiskers Design Studio at a class last year.

attaching hanger and first ribbon bow for a ribbon capped strawberry
Here’s the other design I stitched from Prairie Strawberries by Prairie Schooler. You can see in the photo I have gathered the top and inserted the hanger. I’ve cut a length of ribbon and tied it in a bow around the hanger. Just keep tying bows around the hanger – pushing them down towards the strawberry. Have them facing in different directions.

ribbon cap all done

When you are satisfied with the ribbons, trim the ends and you are done.

The completed strawberries out in my little garden

Here are the two finished strawberries. I love them! – So cute!
I hope you will enjoy making your own strawberries too and will find this tutorial useful.
Cathy.

Beaded Scissor Fob Tutorial

Welcome to the beaded scissor fob tutorial!  I am posting this a bit early, because I know that there are many readers who are in much earlier time zones, and I want to make sure that these instructions are available for the weekend.  These fobs are so pretty…and so quick and fun to make.  I hope that you find this to be an enjoyable project.


I am right-handed, so I am writing the instructions from that perspective.

Cut a length of beading thread.  You will be doubling up the thread, and will want it long enough to be able to run it through the length of your fob several times, especially if you are using heavy beads.  Now is not the time to be stingy with thread 🙂

Fold your beading thread in half, and thread the two loose ends through the needle.  You will have a loop at the other end.


Pick up the lobster claw clasp and pass the threaded needle through the loop in the clasp.  Now pass the needle through the looped end of the beading thread, and pull tight.  This knot is called a lark’s head knot, and a good picture of it can be found here.

Now, you need to make a couple more knots to make sure your beading thread is secure.  Don’t worry…it’s not hard.  Relax and take a couple of deep breaths 🙂

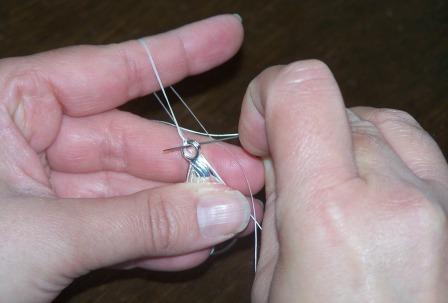
Refer to the series of pictures below for clarification of the procedure.

Hold the lobster claw clasp in your left hand.  I hold it between my thumb and ring / pinky finger.  Create a loop by loosely wrapping the thread around your index finger on your left hand.  Pass the needle through the loop in the lobster claw clasp, and then through the loop in the thread.  Pull tight.  Repeat this a couple more times.

Knotting procedure pictures:

fob8.jpg

fob9.jpg

fob10.jpg

You will be repeating the steps above a bit later on.   The good news is that this is as complicated as it gets!

Thread your selected beads and spacers onto the beading thread until you are happy with the length and appearance.  There aren’t any rules here!  If you don’t like what you have done, it is easy enough to change the arrangement.  I usually like to keep the beaded portion of my fobs around 4 inches, especially if I am using large glass beads.  If you are using more delicate beads, you could make it longer.  I also like to use the spacers at the beginning and end of the fob, and between the beads as accents.  When you are happy with your design, carefully set your fob aside while you do the next step.

fob4.jpg

Thread the jump ring onto the charm.  This is always the hardest part for me…and especially so if you have long fingernails 🙂

fob5.jpg

Carefully pick your fob back up and thread on the charm.

If you are using lightweight beads, you could knot the charm on at this point, following the same knotting procedure shown in the pictures above.  You also would probably not need to run the thread back and forth through the fob several times as I describe below.  I have found that the knotting the charm on and maintaining the proper slack is very difficult to do at this point if you are using heavier glass beads like I have chosen.  I also feel safer about the durability of the fob if I run the thread through the length of it several times.  You can decide if it is necessary or not, depending upon the materials that you have selected.  If you choose to skip all of this, feel free to jump on down to the ending off portion of the instructions 🙂

fob6.jpg

Run the needle and thread all of the way back through your beads until you get back to the lobster claw clasp.  It works best to run your needle through a couple of beads at a time while you are doing this.  Once you are back up to the lobster claw clasp, make sure that you have the desired amount of slack between all of the beads and charm.  You don’t want it to be too tight, since it won’t be flexible.  Too loose isn’t good, either.   I have found that it is easier to achieve the appropriate slack if you do this rather than trying to knot the charm on directly.

Make another knot or two on the lobster claw clasp end, using the same process that you used in the beginning (refer back to the series of knotting procedure pictures above).

Now you are going to run the beading thread back to the charm end, using the same process that you used to get to the lobster claw clasp end.  When you reach the charm, make a couple of knots to secure the charm.  Again, you will use the same process shown in the series of hand pictures above).

If you have chosen to jump ahead, here is where you will pick up the instructions again…

Run the beading thread partially back up the the length of the fob.  Make a couple more knots to secure, and then run the thread back up a couple of beads or so before cutting it off.

If desired, you can reinforce your knots on the lobster claw clasp end and charm end with a dab of clear nail polish.

That’s it!  Stand back and admire your beautiful creation.  I’m sure that you will now want to make several more of these 🙂

If you have any questions or need clarification on anything, please do not hesitate to leave a comment or send me an e-mail.

fob7.jpg

Beaded Scissor Fob Supply List

The beaded scissor fob class will be held on the weekend of February 16-17.  These are so pretty…and so quick and fun to make.

Here are some examples of fobs that I have made in the past:

 fobexamples.jpg

Supplies that you will need:

* Beading thread
* Pretty beads (the ones that come strung on cards often have smaller coordinating beads along with the larger ones.)
* Spacers (the metal decorative beads shown above…you don’t need to use these, but they are a nice touch and good to at least use at the top and bottom of the fob.)
* Charm 
* Jump ring
* Lobster claw clasp (large enough to hook onto a pair of scissors)
* Needle (any size will work, as long as it will pass through the holes in the beads that you have selected)
* Scissors
* Clear nail polish (optional)

Edited to add:  I have found all of my beads & beading supplies at either Hobby Lobby, Michael’s or Walmart.  The charms that I used were from Walmart, and the glass beads were from Hobby Lobby.  Any of the places mentioned carry spacers, jump rings, and beading thread.  I am pretty sure that the large lobster claw clasps were found at Hobby Lobby.  They have their stock organized more by brand then category, so you may have to check in a couple of different spots in the beading aisle.   The ones that I used measure about 1 inch from end to end, and about 1/2 inch wide. 

fob1.jpg

So, gather your supplies and get ready for a fun class!  Please let me know if you have any questions about the supply list 🙂