
This tutorial is the next in my list of the many ways you can finish a scissor fob. The whip-stitched edge is one of the most versatile ways to attach two stitched pieces of fabric together, and is the perfect stitch for finishing scissor fobs. The next tutorial will include a beaded edge and tassel … so watch this space for that one … and in the meantime I hope you find the below tutorial of use. As always if there is something that is unclear or you have any questions don’t hesitate to scream out!
Scissor Fob with whip-stitch edging
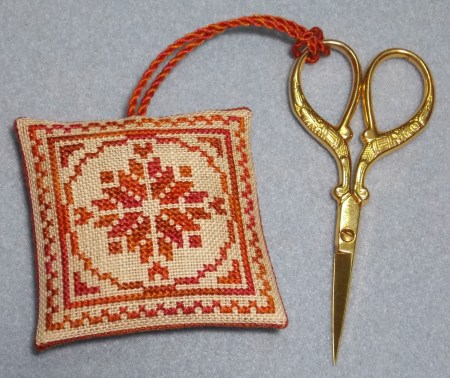
You will need:
- Stitching (identical size front and back)
- Cording or ribbon for the hanger
- Matching cotton floss for the whip-stitching
- Your choice of filling (eg polyfil, teddy bear pellets, etc)
1. Firstly you need a back-stitched line of stitching outside your stitched pieces, both front and back. The stitching must be identical in size on both the pieces, so make sure you count very very carefully, or your sides won’t match when you whip-stitch the sides together. In most cases I stitch approx 2 stitches away from my main stitching (ie 4 threads away on linen and 2 squares away on aida fabric).

2. Cut away the excess fabric from each piece, leaving approx 3/4 to 1cm seam allowance.

3. At this point I realised I hadn’t yet made myself a piece of cord, so I nipped off to quickly put a piece of cord together … see the previous tutorial for making your own cord. Alternatively you can use a piece of ribbon with the ends knotted together in the same way as the cord below.

4. Now we need to turn over the seam allowance of your stitched pieces. First of all I fold over the corners right at the hole of the corner stitches of the back-stitched line.

Then fold over the seam itself along the back-stitched line of stitches.


Continue all the way around until all the edges are folded over. You may prefer to hold down the seams with a pin – if you do this, though, don’t forget to pin it from the right side so you don’t accidentally stitch your pins on the inside of the fob!


5. Now we start to back-stitch around the fob and stitch the front and back pieces together. I usually use 2 strands of cotton floss for my edges. Note that I have used a contrasting thread here so that the stitches show up more clearly – you can choose to do this if you want to have a contrast of the threads, but normally I prefer to use a complimentary thread colour to the fob, and usually use the same colour for the back-stitched seam lines and for the whip-stitching.
Start by coming up with your needle in the corner hole of one of the back-stitched lines. I usually cheat and use a small knot to anchor my thread in the seam allowance.


Then take your needle under one of the back-stitches – start with the first stitch on each side.
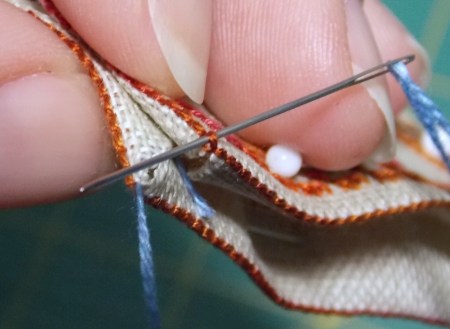
And continue to take it under the stitch that is directly opposite on the other piece of fabric (once again the first stitch on that side of the fabric).

Then come back to the first piece of fabric, and take your needle under the next stitch and once again underneath the stitch directly opposite.

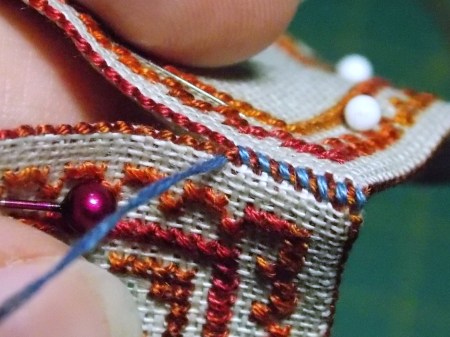
You continue this way until you come to a point where you want to attach your fob hanger. In this case I could have made my fob to hang in a diamond shape, or in a square shape … I ended up deciding on the square shape this time round.

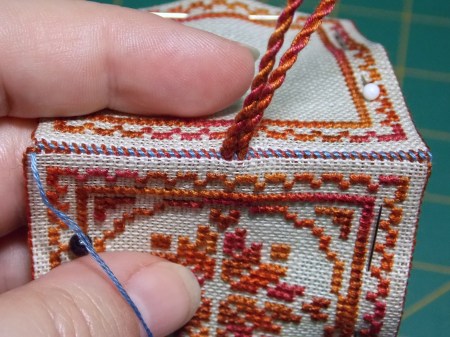
To do this I continued whip-stitching the seam until I almost came to the half-way point across one of the sides – then I inserted the knot of the cord into the seam.


Continue to whip-stitch through each side of stitches, but for the next two stitches you’ll need to pass your needle through the centre of the cord as you stitch – this will ensure that your cord doesn’t come free and helps to cement it neatly in place.

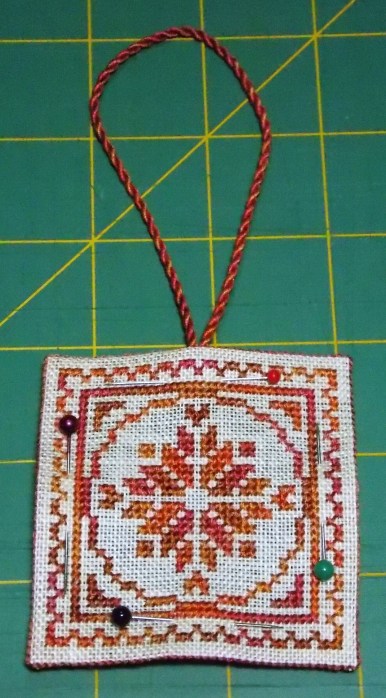
6. Continue to whip-stitch all the way around 3 of the sides, then leave a small opening on the 4th side so you can insert the filling of your choice. In my case I’ve used my favourite choice, teddy bear pellets. (You will see that I’ve now started using the ‘proper’ coloured thread now to complete the finishing.)

Once you have filled to your desired level, continue to finish off the remaining stitches.

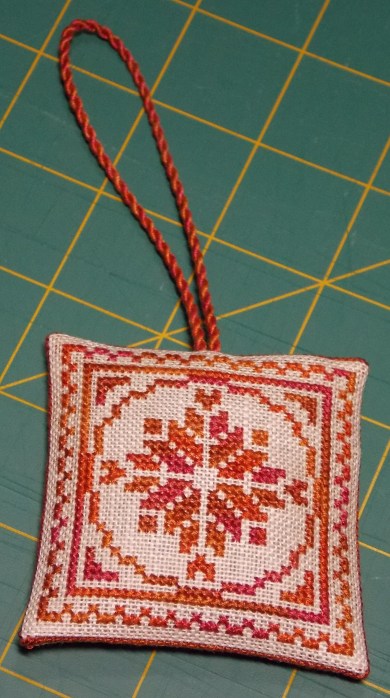
Finish off your thread at the end, and voila, your fob is all finished!!
I hope you enjoyed the latest tutorial – thanks again for your previous comments on the other tutorials, it helps the motivation to keep doing more! 🙂


Thank you for your wonderful tutorials, Anne–they are so well done and very helpful. I haven’t tried using he teddy bear pellets yet–will have to look into them!
Thanks Carol! 🙂 I love teddy bear pellets – they’re quite light, but have more weight than Polyfil, which I love for fobs. This is probably the largest size I’d use for the pellets, though … and it helps that the linen I chose was the stiff Wichelt linen so it isn’t floppy at all 🙂
Thank you for this amazingly clear tutorial! I really appreciate all the effort this required!
Thanks so much Lee! It’s comments like you ladies have been leaving that makes it feel worthwhile and inspires me to continue! 🙂
Thank you for another great tutorial! I love the edging on this one and it doesn’t look hard. I will give it a try on my next project!
Thanks Carolyn – I’d love to see your finishes once you give it a try. It really isn’t very hard at all, you’ll be surprised just how easy it is, and it’ll boost your confidence no end (I still remember the first one I ever finished, and was dead chuffed with myself!). Don’t forget to send me a link to your finished article! 😀
Thanks Anne, your tutorials are really helpful.
Thanks Deborah! 🙂
Anne,
I like your insturctions. They are very clear. I am wondering if you have ever finished a box with a metal rim? I have a tooth fairy box and would love to know how to finish it.
Unfortunately I haven’t tried that sort of finishing before Judy – always happy to try something new, though … perhaps you can email me a photo of the box, and I can see if it’s something I could work with? 🙂
Thank you for your instructions on making up the scissor fob. I knew how to do the whip stitch but not the ribbon or the beaded edge. They were very clear and helpful. xx
Thank you for this clear tutorial. Can’t wait to start on ornaments this year for the kiddos.
Thanks for your feedback – it’s always lovely to hear that people are finding the tutorials useful 🙂