Updating the Tutorial Links page

Apologies for leaving the blog unattended for so long … aside from a sudden burst of eventually writing and adding more tutorials to the blog, I’ve also been checking the various links on the Tutorial Links page and removing those that are no longer active links.  And in case you’re wondering, yes there are still more tutorials to come in the future, I’m just staggering them at the moment while I juggle general day living duties and also trying not to run out of tutorials too soon so there is nothing left to contribute! 🙂

I have to say it feels really disheartening that so many links are no longer active, and blogs themselves that have closed down.  I’m sorry to see some of my favourite tutorials now removed from public viewing, and am now kicking myself that I didn’t take more notice and take my own notes for future use.  All that expertise gone forever from the public domain.  And it makes me wonder what has happened in the past to make our fellow stitchers not want to participate in the online community anymore and remove the information.  Is it due to lack of comments and feedback?  Were they business blogs where the business has now been sold or folded along with the pages?  Have personal circumstances changed and they no longer have a stitching interest?

Just a little ponderance for myself for the evening while I’m culling the tutorial links list to what appears to be at least half the size it once was!  Very very sad, I think, when I realise the sheer volume of information that is no longer available … perhaps we all need to ensure we show our support of our fellow stitchers to help keep them motivated and keep the information alive?  It’s an interesting question, I think, and I truthfully don’t know the right answer!


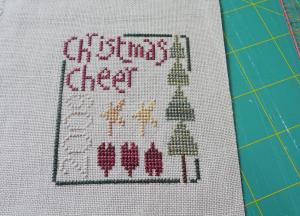
Scissor Fob #3 (with whip-stitch edging)

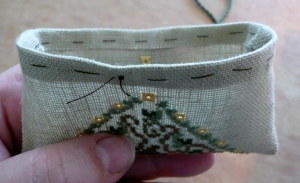
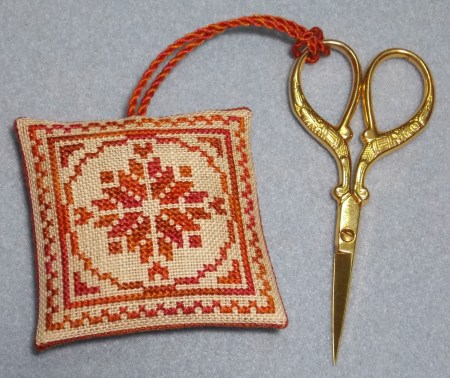
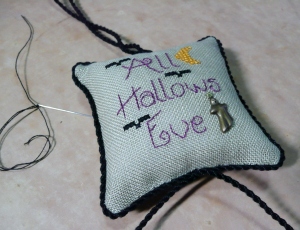
This tutorial is the next in my list of the many ways you can finish a scissor fob. The whip-stitched edge is one of the most versatile ways to attach two stitched pieces of fabric together, and is the perfect stitch for finishing scissor fobs. The next tutorial will include a beaded edge and tassel … so watch this space for that one … and in the meantime I hope you find the below tutorial of use. As always if there is something that is unclear or you have any questions don’t hesitate to scream out!

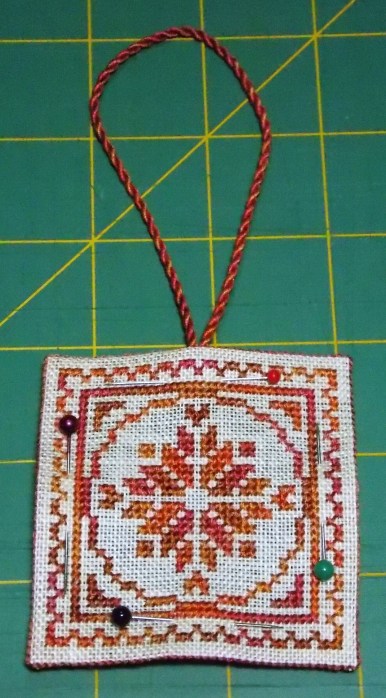
Scissor Fob with whip-stitch edging

DSCN0404

You will need:

  • Stitching (identical size front and back)
  • Cording or ribbon for the hanger
  • Matching cotton floss for the whip-stitching
  • Your choice of filling (eg polyfil, teddy bear pellets, etc)

1. Firstly you need a back-stitched line of stitching outside your stitched pieces, both front and back. The stitching must be identical in size on both the pieces, so make sure you count very very carefully, or your sides won’t match when you whip-stitch the sides together. In most cases I stitch approx 2 stitches away from my main stitching (ie 4 threads away on linen and 2 squares away on aida fabric).

DSCN0372

2. Cut away the excess fabric from each piece, leaving approx 3/4 to 1cm seam allowance.

DSCN0373

3. At this point I realised I hadn’t yet made myself a piece of cord, so I nipped off to quickly put a piece of cord together … see the previous tutorial for making your own cord. Alternatively you can use a piece of ribbon with the ends knotted together in the same way as the cord below.

DSCN0374

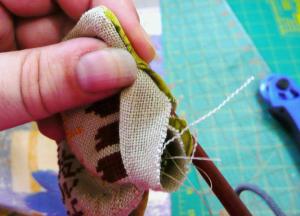
4. Now we need to turn over the seam allowance of your stitched pieces. First of all I fold over the corners right at the hole of the corner stitches of the back-stitched line.

DSCN0375

Then fold over the seam itself along the back-stitched line of stitches.

DSCN0377

DSCN0378

Continue all the way around until all the edges are folded over. You may prefer to hold down the seams with a pin – if you do this, though, don’t forget to pin it from the right side so you don’t accidentally stitch your pins on the inside of the fob!

DSCN0381

DSCN0382

DSCN0383

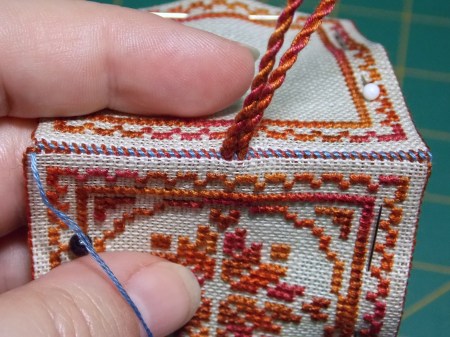
5. Now we start to back-stitch around the fob and stitch the front and back pieces together. I usually use 2 strands of cotton floss for my edges. Note that I have used a contrasting thread here so that the stitches show up more clearly – you can choose to do this if you want to have a contrast of the threads, but normally I prefer to use a complimentary thread colour to the fob, and usually use the same colour for the back-stitched seam lines and for the whip-stitching.

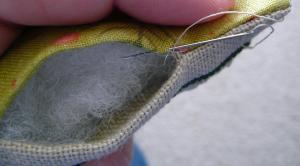
Start by coming up with your needle in the corner hole of one of the back-stitched lines.  I usually cheat and use a small knot to anchor my thread in the seam allowance.

DSCN0387

DSCN0389

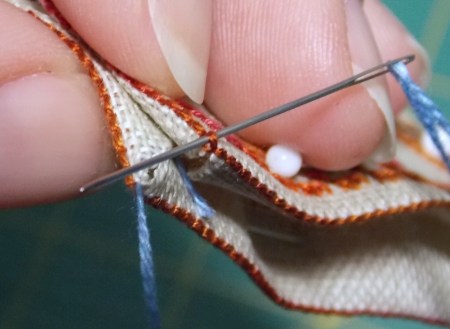
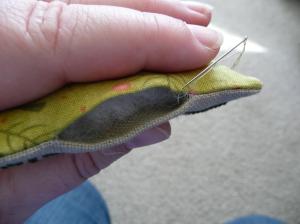
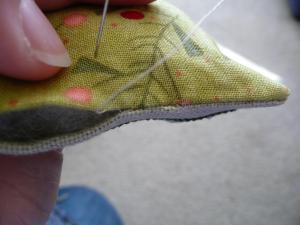
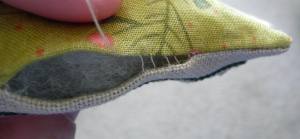
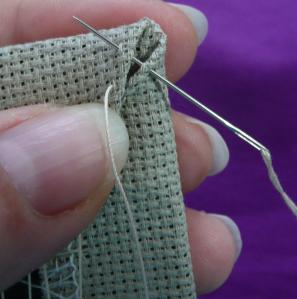
Then take your needle under one of the back-stitches – start with the first stitch on each side.

DSCN0391

And continue to take it under the stitch that is directly opposite on the other piece of fabric (once again the first stitch on that side of the fabric).

DSCN0392

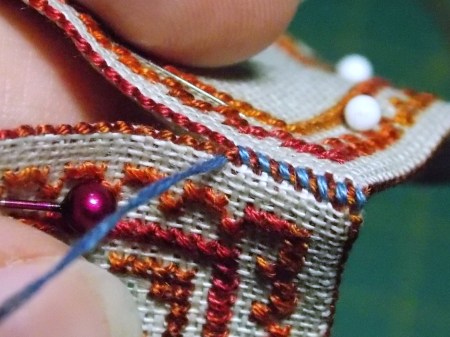
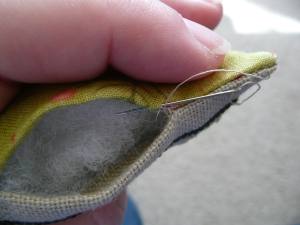
Then come back to the first piece of fabric, and take your needle under the next stitch and once again underneath the stitch directly opposite.

DSCN0393

DSCN0394

You continue this way until you come to a point where you want to attach your fob hanger. In this case I could have made my fob to hang in a diamond shape, or in a square shape … I ended up deciding on the square shape this time round.

DSCN0385

DSCN0386

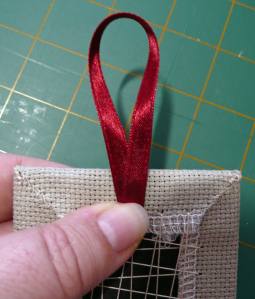
To do this I continued whip-stitching the seam until I almost came to the half-way point across one of the sides – then I inserted the knot of the cord into the seam.

DSCN0395

DSCN0396

DSCN0397

Continue to whip-stitch through each side of stitches, but for the next two stitches you’ll need to pass your needle through the centre of the cord as you stitch – this will ensure that your cord doesn’t come free and helps to cement it neatly in place.

DSCN0398

DSCN0399

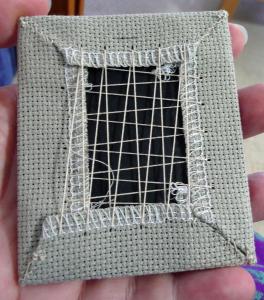
6. Continue to whip-stitch all the way around 3 of the sides, then leave a small opening on the 4th side so you can insert the filling of your choice. In my case I’ve used my favourite choice, teddy bear pellets.  (You will see that I’ve now started using the ‘proper’ coloured thread now to complete the finishing.)

DSCN0400

Once you have filled to your desired level, continue to finish off the remaining stitches.

DSCN0402

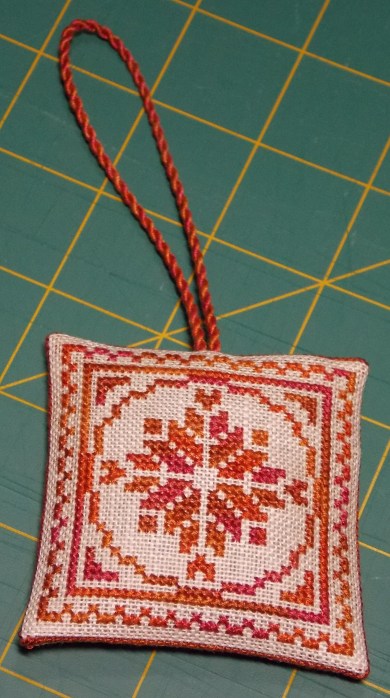
Finish off your thread at the end, and voila, your fob is all finished!!

DSCN0403

I hope you enjoyed the latest tutorial – thanks again for your previous comments on the other tutorials, it helps the motivation to keep doing more! 🙂

Scissor Fob #2 (with corded edging)

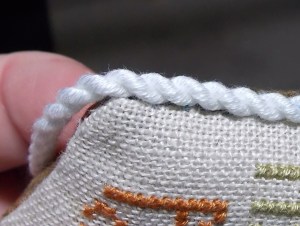
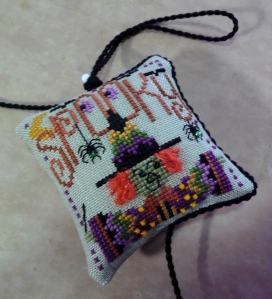
This time round the scissor fob I’ve chosen is a simple pillow with a corded edging.  I think it is better to use a home-made cord for this, as it is softer to manipulate, but you can always try to use purchased cord if the home-made cord intimidates you too much!

P1080011

Materials needed:

  • Your chosen stitched piece, including a front and back
  • Polyfil stuffing or other stuffing of your choice (eg teddy bear pellets or crushed walnut shells)
  • DMC pearl cotton or cotton floss for cording
  • DMC cotton floss for attaching the cord
  • Sewing needle (either a sharp or tapestry needle)
  • Pins and scissors

P1060958

1.  First of you you need to cut the front piece of your stitching into the desired size.  I find the easiest way is to count the number of threads when using linen or the number of holes when using aida.  In this case I followed the design’s suggestion and counted out 25 threads from the stitching, then I pulled out the next thread – this makes a clean line for you to cut the excess fabric away.  Then once all 4 sides of the front piece have been cut, place it face down onto the back piece, with right sides of the stitching facing each other, and cut out the back to be the same size (don’t forget to make sure the back piece is centred correctly before starting to cut – I usually do this by holding the two pieces up together in front of a light source such as a bright window).  Pin the two pieces together.

P1060960a P1060961

2.  Sew a seam around the edges, but leave an open gap at the bottom seam to allow you to turn it inside out and add the stuffing.  I usually leave one long tail of the sewing thread that I use for sewing up the opening at the end.

P1060962 P1060963

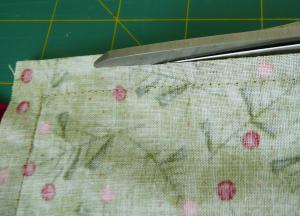
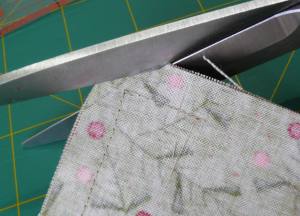
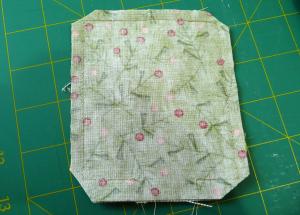
3.  Cut away the corners, but don’t cut too close to the stitching, otherwise it may unravel when you turn the piece inside out.  Then trim back the side seams a little so they aren’t as bulky when turned inside out.

P1060964 P1060965

4.  Turn your stitching inside out.  You may want to ease the corners with a chopstick or something similar for a crisper ‘point’ at the corners – be careful, though, so you don’t make holes in the corners (yes, that’s the voice of experience talking from my first attempt years ago!).

P1060966

5.  Now it’s time to stuff with your choice of stuffing material.  In this case I’ve chosen Polyfil, and once again I use a chopstick to ease some of the stuffing gently into the corners.  The amount of filling you use is down to personal preference – I prefer mine not to be over-stuffed, but firm enough to feel ‘full’.

P1060967 P1060968 P1060969

6.  Next you close up the opening in the bottom seam.  My preference is to use a ladder stitch, however you can use a whip-stitch if that is easier for you.  To do a ladder stitch you just work your way alternatively up each side of the seam, taking a few threads in your needle for each stitch – this looks like the rungs of a ladder when the stitches are loose, and when you pull them tight they close up the seam very cleanly.

P1060971 P1060972

7.  Now it’s time to make your cording.  To do this you’ll need to have quite long pieces of thread, and I used 3 strands of pearl cotton that was supplied with my scissor fob kit.  Details of how to make cording yourself can be found in Scissor Fob #1 Tutorial.

P1060973

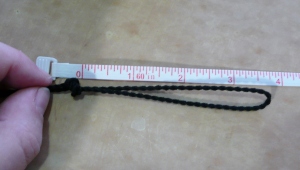
8.  Firstly you need to fold your cording in half and place a knot at approx 3 1/2″ to 4″ from the end.  Of course you may prefer a longer hanger, so feel free to make it as long as you want, just as long as you have enough cord to go around the edges 🙂

P1060975 P1060976

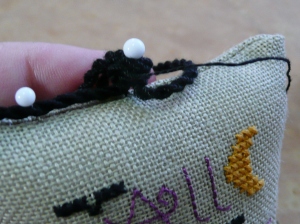
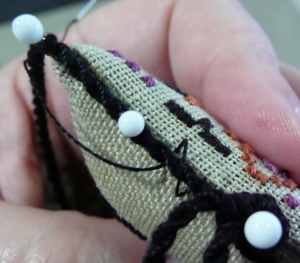
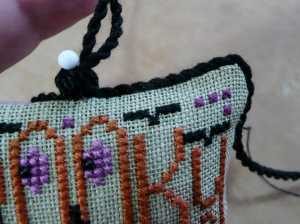
9.  When we start to attach the cording around the edge of the scissor fob ‘pillow’, I find it easiest to place a pin through the centre of the cord knot and take it down into the pillow at the centre of the top seam.  From there I take the cord along the top seam and add two more pins to hold the cord in place temporarily.  I start off my thread by poking my needle through the top of the pillow, through the stuffing; pull the needle so the thread just disappears from view under the fabric, then add a few little catch stitches at the back of the knot (because I’m using black thread you can’t see these stitches, if you’re using another colour where the stitching thread shows up, you may want to do your catch stitches underneath the knot out of sight).

P1060984 P1060985 P1060986 P1060987

Bring your needle to one side of the cord and take a small stitch under the seam – I try to put my needle in about 1 thread away from the seam, and come up approx 1 thread away from the seam on the other side, so it’s less likely to be seen.  (I pulled my knot up out of the way to show you the stitches, which pulled my loose tail out, so you need to be careful if you do this yourself!)

P1060989 P1060990

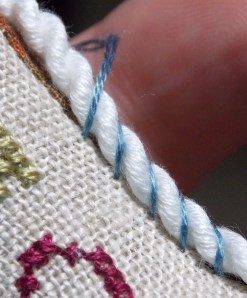
Now you take your needle and thread over the top of the cording to the right-hand side once again, and this time put your needle through the fabric just in front of the next twist in the cord.  You should use the cord as your guideline here for the length of your stitches – your top thread should follow the ‘furrows’ in the cording and sit neatly in the shape of the cord.

P1060998

Unfortunately it’s quite difficult to see this with the black thread, so I have use another piece of cord with a contrasting thread as an example so you can see more clearly what I mean …

DSCN0335

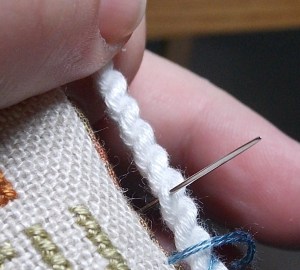
My cord is a dark colour, so I prefer to use the above method to attach my cording – sometimes, though, if you’ve used a variegated thread, or if your cording is a lighter colour, you may prefer to attach the cord with a small stitch underneath the cord attaching it to the fabric.  To do it this way you just need to take your needle through the cord at the bottom the cord:

DSCN0339

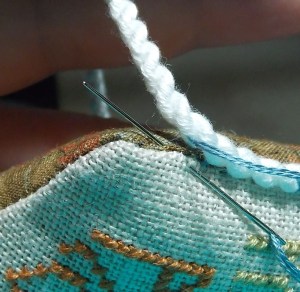
Then take your needle through the fabric seam underneath the cord, bringing the needle through on a diagonal … then continue the same way until the cord is attached.

DSCN0341

DSCN0342

Now after that little cording detour, it’s back to finishing off the scissor fob …

At this point you can remove the pins once your stitching is well underway.  Continue stitching the cord around the edge, stopping at the centre of the bottom seam.

P1080001 P1080002

Now go back up to the top of the cord and do the remaining side the exact same way, and finish off your thread by taking a couple of small stitches into the cord.  Once again I ‘bury my thread’ by taking my needle into the pillow and coming up a wee way away and cutting off the thread flush with the pillow fabric … then you just give your pillow a quick squeeze and the end of the tail disappears.

P1080004

P1080006

P1080007

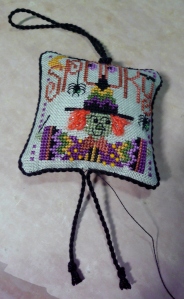
Lucky last, I pop a quick knot at the base of the pillow, and the scissor fob is finished 🙂  If you find your cording is too long, just make another knot at your desired length of each piece of cord, and cut off any extra length not required.

P1080008

10.  All that is left is to attach your fob to your chosen pair of scissors!

P1080011

I hope you have found the tutorial useful – if you happen to use any of the information I’d love to see your projects where you have used them 🙂

Kindest regards,

Scissor Fob Tutorial #1

Note, this post is the property of myself – please DO NOT re-blog any of the content without express written permission by this blog owner (Anne), thanks.

j0439073

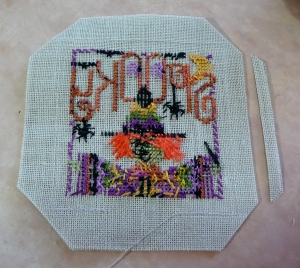
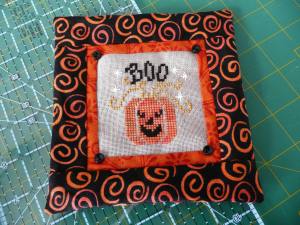
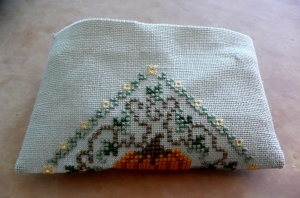
This is the first of a number of upcoming Scissor Fob tutorials … and is the type of finishing used by The Drawn Thread freebie designs and similar to Mill Hill treasure ornament series.  The finish is a diamond shape, which I think is really attractive for a scissor fob.  This one in my tutorial is a bit large for a scissor fob, in my opinion, but the finishing is the same irrespective of the design size you choose 🙂  If you are interested, this is Pumpkin Keeper freebie by The Drawn Thread.
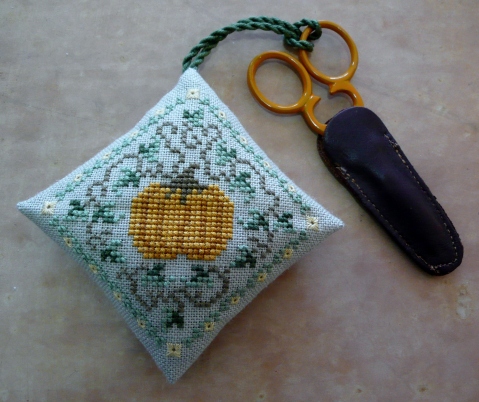
P1060957

Materials needed:

  • Stitched project – this needs to be a square design, preferably stitched in a diamond shape
  • DMC thread or sewing machine thread to match the stitching fabric (and contrasting sewing machine thread for basting, if desired)
  • Stuffing (your preferred choice, can be Polyfil, crushed walnut shells, or teddy bear pellets, for example)
  • DMC for cording, or ready-made cord
  • Pencil or cording drill

1.  Ensure you have equal sides on your stitching – the easiest way to do this is to count the number of squares away from each of your piece if stitched on aida, or count a specified number of threads away from each side when stitching on linen.  In this case I followed the Drawn Thread instructions, which was to count out 24 threads away from the stitched area and cut off the fabric edges.  I find the easiest way to do this is to count out your designated number of threads then remove the next thread, ie pull it all the way out – this leaves a clean channel for cutting a straight line following the weave of the linen, as you can see in the photo below.

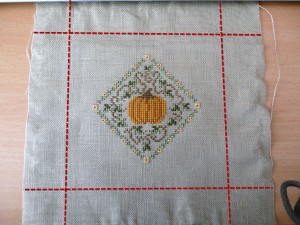
P1040636

P1040636

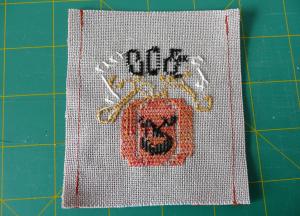
2.  Once you have cut away your edges and have a nice square piece of fabric, fold your stitching in half across the centre of the design, with the right side of the stitching facing each other.  Pin the edges together, and stitch a seam allowance at each of the short edges.  As it is hard to see my thread on the fabric, I have highlighted with red stitching where the seam line is below.

P1060927

P1060927a

I usually prefer top snip the corners slightly to make them easier to make ‘points’ once they’re turned the right-side-out.  If you do this, make sure you don’t snip them too close to the seam line, or it will unravel, and you don’t want that!

P1060928

3.  Now turn your stitched piece inside out, and put out the corners – sometimes I use a pointed chopstick to help get a nice point in the corner, but this needs to be done gently so you don’t poke a hole in the fabric!

P1060930 P1060931

4.  Next we turn over the seam allowance on the top raw edges.  I prefer to give the seam a quick iron to make it sit flat.  You can just pin the seam allowance down around the top, or do as I do which is to baste it down using a contrasting sewing machine thread.

P1060932 P1060933 P1060935

5.  Next bring the two seams together to meet in the centre, and your stitching is in a diamond shape.  I usually pop a couple of pins in temporarily to hold the seams in place.  Turn your piece over to work out which is the top of your stitching, and where the cord will eventually be attached.  In this tutorial, because the fob is so big I’ve decided to just have a cord hanger at the top without any tassel or embellishments at the bottom – another tutorial will cover the option of adding tassels to your fob later.

P1060936 P1060938

6.  Next it’s time to make your cord – obviously if you have purchased ready-made cord you can omit this step, but ensure your purchased cord is quite narrow so you can knot the ends easily.  I made my cord out of DMC cotton floss, and because of the size of the fob I opted to use 4 strands of DMC for my cord as I wanted it to be a bit thicker (my preference is usually 3 strands of either DMC or pearl cotton).  Sometimes it’s trial and error as to how thick the cord will turn out.  It is generally much easier to have another person assist you in making cord, but as I’m on my own I have to improvise with whatever is handy!  I apologise in advance for the poor photos in this section, I will do another tutorial soon to show the steps more clearly …

The first thing to do is to knot each end of the group of threads together.

P1060894

P1060898

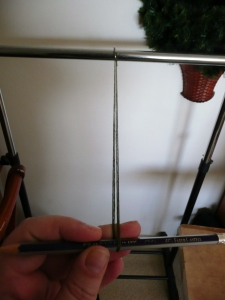
Next you need to rope in an assistance to help out by holding one end of the threads tightly, or do what I do by finding something you can attach the other end to … in my case I have a portable clothes rack that I used, by snapping a metal ring over the rail and hooking the ring through the middle of the threads at the knot end.  Alternatively you could tie the end around a door handle or something similar.

P1060899

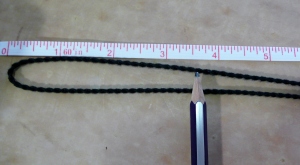
If you have a cord drill, that’s perfect, otherwise you can make do by using a simple pencil to wind the thread.  Take your pencil and insert it through the middle of the remaining end of the thread (at the knotted end), and walk back until your thread is nice and straight.  Then start turning your pencil – it doesn’t matter in which direction you turn your pencil, as long as you continue to turn it the same way 😉  I prefer to use a cord drill as it’s so much quicker, so that’s how I finished my cord off this time round.
P1060900 P1060901 P1060911

You need to keep turning your pencil/cord drill until your threads are very taut.  If you slacken off your tension a little bit and your thread starts to ‘kink’ and turn on itself it’s generally twisted enough.  I let go of the tension a little bit here so I can hopefully show you what I mean about the ‘kinking’ of the thread.

P1060913 P1060915 P1060917

This next part is very tricky to photograph as I needed both hands …  Once your thread is twisted enough, carefully hold the middle of your twisted thread with one hand, then using your other hand bring the two knotted ends together.

P1060918 P1060921

I usually use a self-made weight that I hang in the middle, but forgot to use it this time!  I’ll show that method another time, as it’s a really quick way to get the threads twisting onto themselves!  In this case, however, I just used my left hand (my right hand was still holding the two ends together) to slide up the thread about an inch, and using my thumb and forefinger gave the threads a gentle twist.  You continue to do that by working up the thread and helping the threads twice nicely onto themselves.  Eventually you end up with a beautifully twisted cord.  Then you finish off by knotting the two loose ends together so it doesn’t unravel.  And voilà your cord is finished!! 😀

P1060923 P1060924

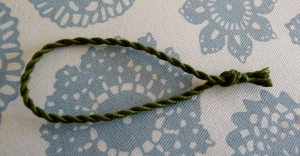
7.  Decide how long you want your cord to be – generally 3 1/2 to 4 inches is about the right length, but you may prefer to have your hanger longer than that – it’s all personal preference!  In this case I’d made my cord quite short so I could do the tutorial easier for you.  Knot the two loose ends together at your desired length.
P1060925

8.  Now it’s time to pick up your stitching once again, and we need to start stitching up the remaining seam.  My preference is to close it up using a ladder stitch, however you can use a whip-stitch if that is easier for you.  Start at the bottom of the fob, away from where the cord will be inserted.  To do a ladder stitch you just work your way alternatively up each side of the seam, taking a few threads in your needle for each stitch – this looks like the rungs of a ladder when the stitches are loose, and when you pull them tight they close up the seam very cleanly.  Keep stitching up the seam until approx 1″ away from the end.

P1060942 P1060944 P1060946

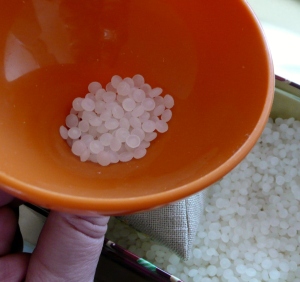
9.  At this point you insert your chosen stuffing.  I have opted to use teddy bear pellets for mine, as I really like the extra weight it gives the fob, especially for smaller fobs (in hindsight I probably should have used Polyfil for one this big!!).  When I stuff with pellets I use a little Tupperware funnel that I find really useful for this job – alternatively you can roll a piece of stiff paper into a funnel instead!

P1060947 P1060948

10.  Now we’re on the homeward stretch, and it’s time to add the cord and close up the seam!  Take your cord, and place the knot inside the seam opening, then continue stitching up the opening to the top.  Sometimes I will take my thread through the cord at the top to stop it from moving around, but it wasn’t needed for my fob this time.  You can now remove all your basting stitches.

P1060953

And that’s it, your fob is all finished and ready to adorn your chosen pair of scissors!!

P1060956

As always, please feel free to leave comments and let me know if you have any questions.  It’s always good to know if you find the tutorials useful, or if there is something you would like to see more of, so the comments are always appreciated!

Kindest regards,

More tutorials added

More tutorial links added today:

  • Creative Poppy – lots of different tutorial links
  • The Floss Box – biscornu
  • The Floss Box – flat ornament
  • The Floss Box – pillow ornament
  • The Floss Box – bottle cap ornaments (these are seriously cute!!)
  • Simply CQ – lining a simple bag (example using a crazy quilt project but any needlework project would work as well)
  • Malinaplass (Webshots album) – Pincushion
  • Adventures in Thread (Jules) – Magnetic needle holder
  • Stitchin Fingers – Triangular boxes
  • Connie Eyberg Originals – tag
  • Creative Poppy (Barbara Ana Designs) – biscornu
  • Creative Poppy (Tam’s creations) – Fabric-backed biscornu (you need to click on the link on Creative Poppy’s main tutorial page on “How to make a biscornu – with contrasting material), as the link goes directly to a .pdf upload and I don’t want to enforce immediate uploads from the link)

New tutorials added

Sorry I’ve been “missing in action” for some considerable time.  Simply a case of some personal issues at home (and ongoing ill health), and moving to a new job that has eaten up most of my spare time.  I am hoping to rectify the situation soon and have been working on some new tutorials which I will finish soon and publish.  If you have any specific tutorials you’d like to see, don’t hesitate to leave a comment and I’ll do what I can to arrange something 🙂

Since my last post I have also become aware of some “new-to-me” tutorials, which I will be adding to the Tutorial Links page.  The new ones are as follows:

Pin Pillow Tutorial #2

Here is the 2nd pillow tutorial resulting from my finishing spree last weekend:

2419601140047689748jZxxnJ_fs

You will need:

  • Stitching for the centre of the cushion
  • Coordinating fabric(s) for side strips and backing
  • Sewing machine with coordinating sewing machine thread to match your fabric(s)
  • Scissors/rotary cutter and mat
  • Pins
  • Embellishments (optional)
  • Polyfil stuffing (or something similar)
  • Sewing needle and thread to close up the seam opening

2958031650047689748tuaVfJ_fs

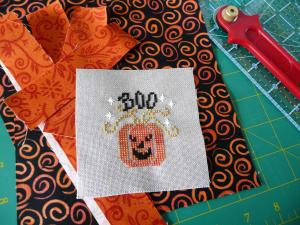
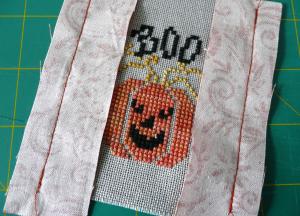
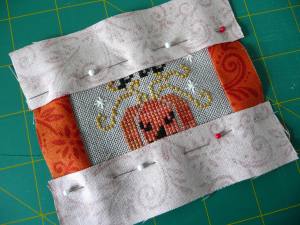
1. First of all cut your coordinating fabric into equal width strips, and approximate width of your sewing project. In my case I have chosen to have two different fabrics on the front of my pillow, and have started with a narrow strip of bright rust fabric for the inner border.

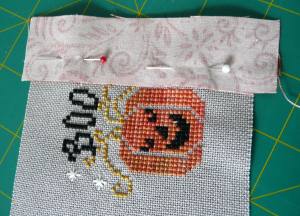
Pin the first strip with right sides facing to your stitching (I prefer to start with the pieces attached to the left and right sides, but you may prefer to start with the top and bottom sections first), and stitch a normal seam allowance (alternatively you may prefer to just a quilters 1/4″ seam).

2407215140047689748FTMiqW_fs

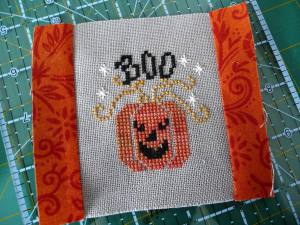
Once you have stitched the first seam, attach the 2nd strip of fabric to the opposite side of your stitching and stitch another seam.

2690648670047689748CoJOoe_fs

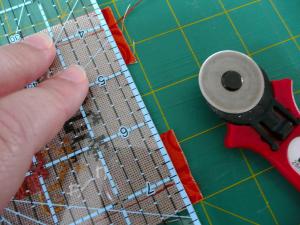
2. At this point I cut off my excess fabrics on each side, and trim my seams to 1/4″ – I usually prefer to do this because I don’t trust myself to get things right the first time!

2099746380047689748GPoFiR_fs

3. You finish with nice tidy edges, ready to attach the last two sides of fabric.

2657349570047689748aUuYib_fs

4. Before we do that, though, we need to open the fabric sides up and give them a quick press with the iron so that they sit nicely. If you want to you can also do a row of top-stitching to assist with holding the fabric nicely, but I don’t normally bother.

2299624430047689748yeaHrN_fs


2638518820047689748YLkpwC_fs

5. Now we attach the top and bottom sides in exactly the same way as we did with the first two sides. Once all sides have finished, I normally check the side strips to ensure they’re nice and tidy and even, and if not I give them a quick trim all round with the rotary cutter.

2911215730047689748nUaGTK_fs

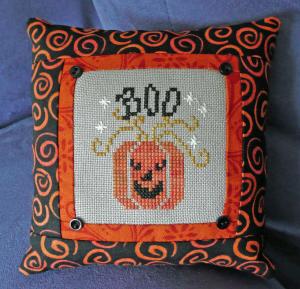
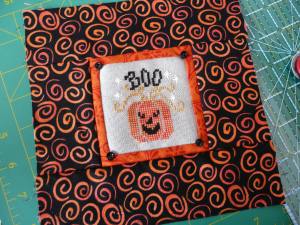
6. In my case I decided to just have a narrow strip of bright rust fabric as a contrasting focal point, then added some wider strips of fabric for the outside edges. These are attached in exactly the same way as the rust strips, they are just cut into wider pieces. You just need to remember to add the next lot of strips in the same order as you did previously, which was in my case left and right first, followed by top and bottom. Once I had ironed my finished strips I decided that little buttons would be nice in the corners, so I added these before adding the backing fabric.

2123196290047689748RjcOVt_fs

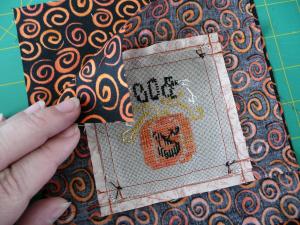
7. Now you need to cut your backing fabric the same size as your finished article, and pin them together with right sides facing together (the right side of the stitching will be on the inside of the sandwich).

2988301120047689748lgAgCE_fs

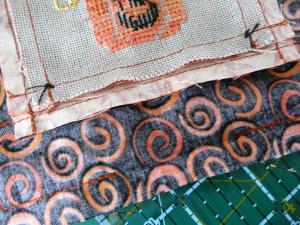
8. Stitch a seam allowance around the edges, but leave an opening at the bottom so that you can turn your pillow inside-out. I tend to leave about 1 1/2″ opening and that’s normally enough room to allow for turning.

2435833260047689748arated_fs

9. I use a chopstick to help push the corners into a nice shape from the outside – you just have to be careful not to force the seam stitching too much! Once you have turned your pillow inside out, it should look something like this. Now all you have to do is stuff it to your preferred thickness with your favourite stuffing.

2251500190047689748icYwpz_fs

10. I close my pillow openings with a ladder stitch – and the following is taken from a previous Christmas ornament tutorial, but is the exact same instruction for closing the pillows.

As you can see from the photo below, I start off by slipping my needle into the seam of the backing fabric, then coming back out about 1/4″ along the seam (about 3mm) and bring my needle out.

SimplePillowOrnie23

I then take my needle directly opposite where I just came out of the backing fabric and slip my needle into the linen and follow the seam along for about 3mm and bring the needle back out again.

2194773970047689748yTwcdd_fs

I’ve left the stitches nice and loose in the photo below to help illustrate how the stitches follow along opposite each other, like rungs of a ladder.

2262966270047689748zIRkfV_fs

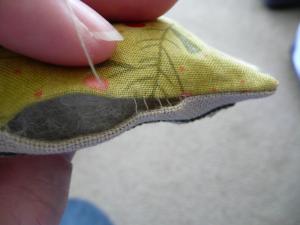
When you pull the thread tighter, the stitches almost disappear into the fabric, giving a really nice clean finish – this is definitely my favourite stitch for closing up openings for that reason!

2648772410047689748VxlgxN_fs

Once you reach the end of the seam opening, you need to finish off your thread with a couple of teeny stitches – I then bury the needle into the seam and come out somewhere about an inch way and bring the needle back out again – then clip the thread close to the fabric so that my thread tail does’t appear easily.

And here’s the final seam all finished off – see now nice and tidy that ladder stitch is in the opening? :D

2761840410047689748NKnzRz_fs

11. And that is the final step in your beautiful new pin pillow coming to life. Now all you need to do is to find somewhere to display it where it can be admired by everyone 😀

2419601140047689748jZxxnJ_fs

Pin Pillow Tutorial #1

Here is a pin pillow tutorial that I put together during a day of finishing last weekend – I finally managed to sit down and put the instructions together today.

2698291120047689748GdtJUD_fs

You will need:

  • Stitching for the centre of the cushion
  • Coordinating fabric(s) for side strips and backing
  • Sewing machine with coordinating sewing machine thread to match your fabric(s)
  • Scissors/rotary cutter and mat
  • Pins
  • Ribbon/lace/button embellishments (optional)
  • Polyfil stuffing (or something similar)
  • Sewing needle and thread to close up the seam opening

2027097940047689748Zulokh_fs

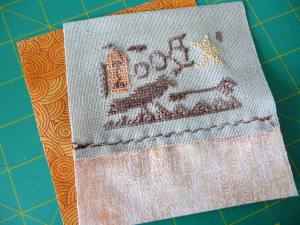
1. First of all trim your stitched piece, and cut your coordinating fabric to your preferred length and the approximate width of your sewing project. In my case I have chosen to have my coordinating fabric at the bottom of my stitched piece, and I prefer to have the quilting fabric slightly smaller than my stitched piece so it doesn’t take too much attention from the stitching – I have, however, seen some stunning pillows with the stitching taking up just a small amount of room at the top of the pillow. The only difference is down to your preference, as the finishing process is exactly the same.

2685694720047689748YcqtfO_fs


2021272760047689748lkYwGz_fs

2. Pin the fabrics together, with right sides facing, and stitch a normal seam allowance (alternatively you may prefer to just a quilters 1/4″ seam).

2277268790047689748nJhnUL_fs

3. At this point I cut off my excess fabrics on each side, and trim my seams to 1/4″. This is also the time when you should open up the seam(s) and give a quick pressing with the iron.

2375897360047689748bJJBWs_fs

4. If you have decided to have fabric on both sides of your stitching (either top and bottom, or left and right) this you will need to repeat the above process a second time for the additional piece of fabric. Once you’ve finished attaching the coordinating fabrics, check the edges to ensure they’re all even, and give it a quick trim with the rotary cutter if needed.

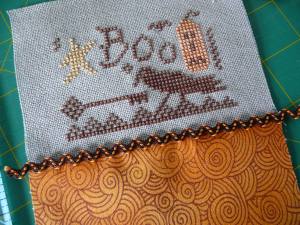
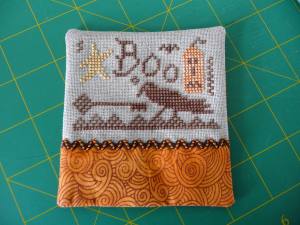
5. At this point I add any seam embellishments to the pillow front. For this particular pillow I just wanted to add one row of matching ric-a-rac. This can either be attached by the sewing machine or by hand (I ended up adding this one by hand, as I didn’t have a matching brown sewing machine thread). This is also a good time to add any buttons or other trims you want to add, prior to constructing the pillow itself. Alternatively, you can add your ribbon at the very end once the pillow is finished, but just wrapping it around the pillow and tying a bow to hold it in place 🙂

2642088720047689748bRDPgO_fs

6. Now you need to cut your backing fabric the same size as your finished article, and pin them together with right sides facing together (the right side of the stitching will be on the inside of the sandwich).

2374733320047689748wTwZkx_fs

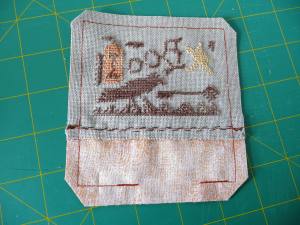
7. Stitch a seam allowance around the edges, but leave an opening at the bottom so that you can turn your pillow inside-out. I tend to leave about 1 1/2″ opening and that’s normally enough room to allow for turning.

2677311630047689748GXjCzq_fs

8. I use a chopstick to help push the corners into a nice shape from the outside – you just have to be careful not to force the seam stitching too much! Once you have turned your pillow inside out, it should look something like this. Now all you have to do is stuff it to your preferred thickness with your favourite stuffing.

2211549530047689748YhZOXR_fs

9. I close my pillow openings with a ladder stitch – and the following is taken from a previous Christmas ornament tutorial, but is the exact same instruction for closing the pillows.

You need to thread your sewing needle with sewing thread (if you didn’t leave a long tail from the seam stitching). You should use a sharp needle here, not a tapestry needle, so that you can pierce the backing fabric easily.

As you can see from the photo below, I start off by slipping my needle into the seam of the backing fabric, then coming back out about 1/4″ along the seam (about 3mm) and bring my needle out.

SimplePillowOrnie23

I then take my needle directly opposite where I just came out of the backing fabric and slip my needle into the linen and follow the seam along for about 3mm and bring the needle back out again.

2476698410047689748jTLefH_fs

I’ve left the stitches nice and loose in the photo below to help illustrate how the stitches follow along opposite each other, like rungs of a ladder.

2262966270047689748zIRkfV_fs

When you pull the thread tighter, the stitches almost disappear into the fabric, giving a really nice clean finish – this is definitely my favourite stitch for closing up openings for that reason!

2122000840047689748JZSJVl_fs

Once you reach the end of the seam opening, you need to finish off your thread with a couple of teeny stitches – I then bury the needle into the seam and come out somewhere about an inch way and bring the needle back out again – then clip the thread close to the fabric so that my thread tail does’t appear easily.

And here’s the final seam all finished off – see now nice and tidy that ladder stitch is in the opening? :D

2761840410047689748NKnzRz_fs

10. And that is the final step in your beautiful new pin pillow coming to life. Now all you need to do is to find somewhere to display it where it can be admired by everyone 😀

2698291120047689748GdtJUD_fs

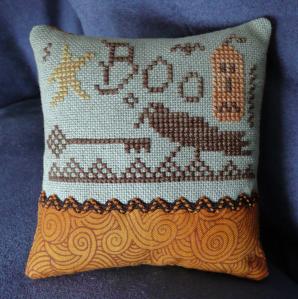
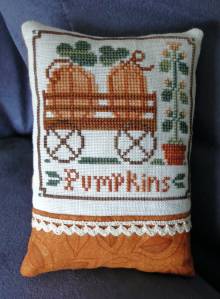
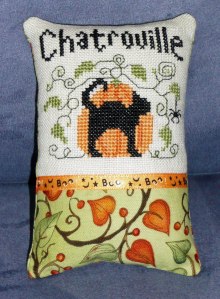
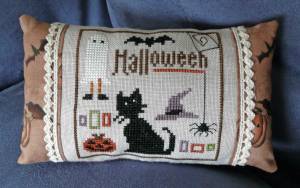
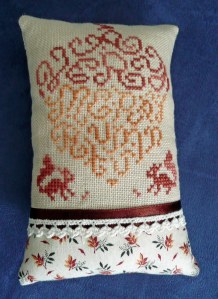
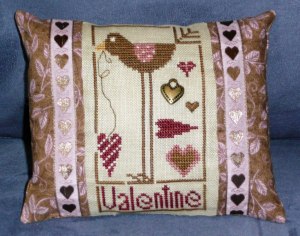
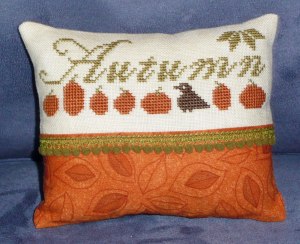
Following are some additional pillows I have finished in the same way – isn’t it amazing how such a simple finishing method can look so different depending on the choice of fabrics and embellishments?
Pumpkins-pillow Chatrouille-pillow Halloween-pillow P1030899 Valentine-pillow Autumn-pillow

Simple Pillow Christmas Ornament

The following is a very basic pillow Christmas Ornament tutorial designed, in particular, for beginners.

2344284810047689748aYvYZa_fs

Supplies needed:

  • Stitched project
  • Backing fabric
  • Approx 6″ (15-16cm) of ribbon to coordinate with your stitching for the hanger (I normally use 7mm double-sided satin ribbon)
  • Stuffing
  • Sewing machine with coordinating thread to match your fabrics
  • Complimentary sewing thread and needle

2355145500047689748UsCCGB_fs

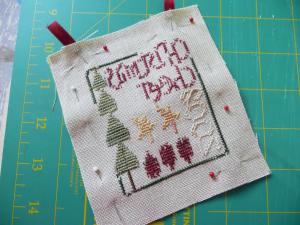
1.  Start off by laying your stitching piece on top of your backing fabric, with wrong sides facing, as shown below:

2647796370047689748OubnSo_fs

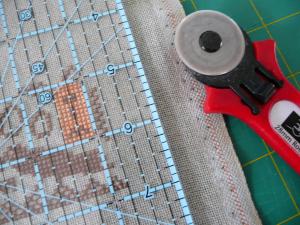
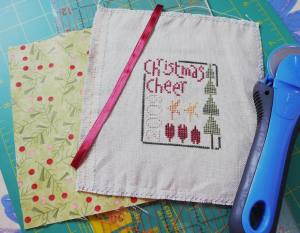
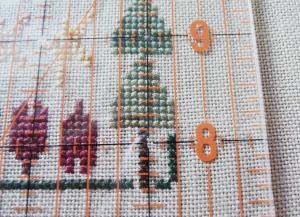
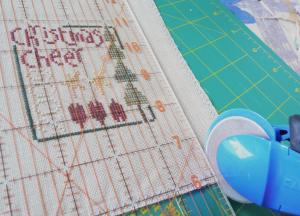
2.  Now we need to cut the fabric so that all sides are equal.  The amount of margin that you leave is up to you, here you can see that I’ve allowed 3/4″ margin on each side.  I line up my ruler along the edge of my stitching, and cut the fabric with my rotary cutter (both my stitched piece and backing fabric at the same time).

2026565680047689748LnHzCD_fs2061297820047689748DNZzQU_fs 2630929000047689748ELNCSI_fs

3.  You continue this same way until all four sides are cut away.  Remember that your backing fabric is underneath, so you need to be careful when you are moving your stitching around on the cutting mat that the fabric doesn’t move out of place or your pieces won’t match at the end.  Once you have finished cutting all four sides, remove the backing fabric from your stitching fabric.

2654504700047689748dqCozX_fs

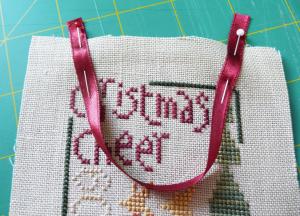
4.  Next I attach the piece of ribbon to my stitching – the ribbon must be attached to the right side of your stitching.  Adjust the size of the loop to match your own preferences, then pin in place.  I like to have a slight angle to the top of the ribbon where it is pinned in place, so that it hangs nicer when it’s finished.

2804964410047689748MiQMGO_fs

5.  Next place your backing fabric on top of your stitching/ribbon, with right sides facing, as shown below.  Pin the pieces together around the edges.

2387926890047689748PfDIEt_fs 2860676260047689748omZJcC_fs

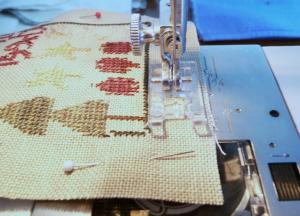
6.  Now we need the sewing machine – once again, it is up to you to choose how much fabric margin you’d like to leave around the stitched piece.

2039010170047689748uVguIB_fs

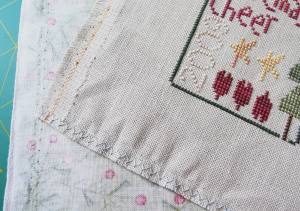
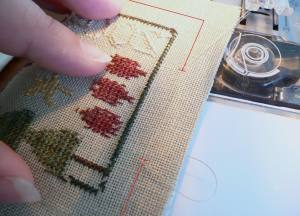
It’s quite hard to see the stitching threads because they match the fabric so well, so I’ve doctored the photo and drawn a line to show you the stitching line of where I started and finished – hopefully you can see clearly now that I have left an opening of about 1 1/2″.  I like to leave a long tail of the sewing thread at one end, which I don’t trim off, so that I can use it for stitching up the final seam opening.

2901429400047689748dripAW_fs

7.  The next step is to trim the fabric at the seams, so they aren’t as bulky when you turn the ornament inside-out.  The photo on the below left is my bottom seam – some fabrics tend to fray a lot when you are trying to pull the fabric through the opening, so I’ve learnt to leave the bottom seam a tiny bit wider than the other three seams.  The photo on the right is the usual amount that I trim back the main seams.

2440744230047689748RJjYyg_fs 2696255610047689748mpjpgL_fs

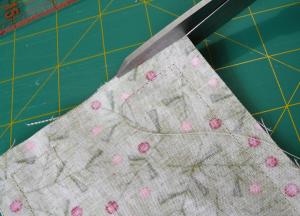
8.  Then you should trim off each of the corners – once again, this allows you to get a crisper point on the ornament corners once you’ve turned it inside-out and improves the look of the ornament.  Just be careful not to snip the stitching!

2454547160047689748jwhULi_fs

Your ornament should now look something like this:

2221631120047689748wrinXi_fs

9.  The next bit can be a little bit nerve-wracking if you haven’t done it before!  You need to reach in and pinch a little bit of the backing fabric between your thumb and forefinger, and then slowly and gently pull the stitching and the backing fabric through the opening so it’s facing the right-side out.  Take your time when doing this, and just pull your fabric through little by little – it seems like it will never come through, but then all of sudden a miracle seems to happen and you have it all turned inside-out.  I often enlist the aid of a chopstick to help me get the corners nice and pointy once I’ve finished turning my ornament inside out.

2071152600047689748Epsxst_fs 2970213450047689748YwLfAb_fs

Your ornament should now look a little something like this.  Of course it was at this point that I realised I’d forgotten to attach my little gold charm to this particular ornament so I had to add that quickly before finishing the next stages … doh!

2582751480047689748rFcpWb_fs

10.  The final stage is to stuff your ornament with stuffing of your choice.  I tend to just use polyester fibrefill from my local craft store.  Once you it stuffed to your satisfaction (my preference is to fill it to a medium level – if I fill it too much it doesn’t sit quite as well on my little tree), you need to thread your sewing needle with sewing thread (if you didn’t leave a long tail from the seam stitching).  You should use a sharp needle here, not a tapestry needle, so that you can pierce the backing fabric easily.

I use a ladder stitch to sew up the opening.  As you can see from the left-hand photo below, I start off by slipping my needle into the seam of the backing fabric, then coming back out about 1/4″ along the seam (about 3mm) and bring my needle out.

SimplePillowOrnie23

I then take my needle directly opposite where I just came out of the backing fabric and slip my needle into the linen and follow the seam along for about 1/4″ (3mm) and bring the needle back out again.

2476698410047689748jTLefH_fs

I’ve left the stitches nice and loose in the photo below to help illustrate how the stitches follow along opposite each other, like rungs of a ladder.

2810558440047689748yQjjCh_fs

When you pull the thread tighter, the stitches almost disappear into the fabric, giving a really nice clean finish – this is definitely my favourite stitch for closing up openings for that reason!

2648772410047689748VxlgxN_fs

Once you reach the end of the seam opening, you need to finish off your thread with a couple of teeny stitches – I then bury the needle into the seam and come out somewhere about an inch way and bring the needle back out again – then clip the thread close to the fabric so that my thread tail does’t appear easily.

And here’s the final seam all finished off – see now nice and tidy that ladder stitch is in the opening? 😀

2959311650047689748YeSBlI_fs

Your ornament is now finished, and ready to hang on the tree 😀

2344284810047689748aYvYZa_fs

I hope you’ve enjoyed this tutorial, and found it useful.  I would love to see any photos of ornaments you’ve completed using this tutorial so please do drop me a line or leave a comment with a link to your pictures 🙂

Christmas Ornament tutorial

I personally don’t think the Just Cross Stitch ornie magazine is very clear with their finishing instructions for ‘newbies’ so I thought I’d make one up myself to help people out that haven’t done this type of finishing before – and show just how simple it is 🙂

This will also hopefully kickstart me into preparing a few more tutorials in the upcoming months … just need to get some stitching finished so I have some smaller things to finish! LOL. Anyway, without further ado, here’s the latest tutorial – hope it will be useful to someone 🙂

j0439073

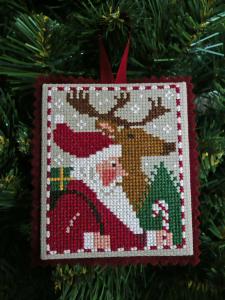
CHRISTMAS ORNAMENT TUTORIAL

(The Prairie Schooler finishing style)

01

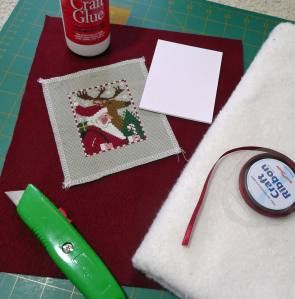
Materials needed:

  • Stitched ornie
  • Felt in coordinating colour
  • Cardboard (I use mattboard)
  • Batting
  • Ribbon for hanger
  • Glue
  • Thread for lacing (I use crochet cotton or pearl cotton)
02
j0439073

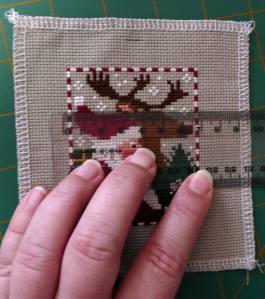
1. Firstly measure your stitched ornie for the size that you want the cardboard to be.

03

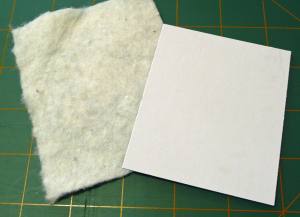
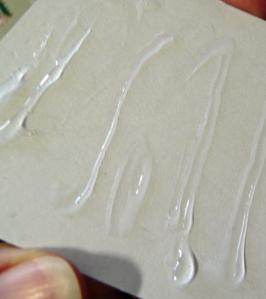
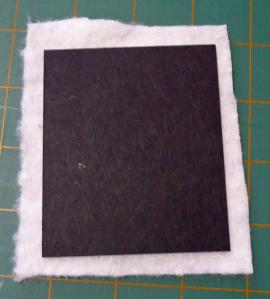
2. Next, cut out your cardboard/mattboard to the desired size. Add glue to one side of the cardboard, and place glue-side down on your batting. Even though I don’t show it in the photos, I actually smooth down the glue with a little offcut of mattboard so that the glue covers the cardboard evenly – that way you don’t feel ugly bumps on the front when it dries (my mattboard is black on one side, it just happened to be the piece that our local framers gave me).  If you prefer to have your ornament more padded, you can add additional layers of batting in the same way, but make sure you only use glue sparingly on the additional layers of batting.

04

05

06

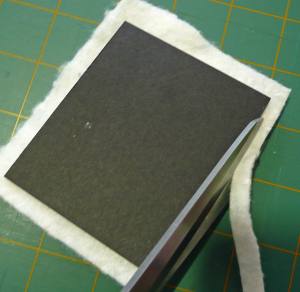
3. Once the glue has dried, cut around the cardboard shape and cut off the excess batting.

07

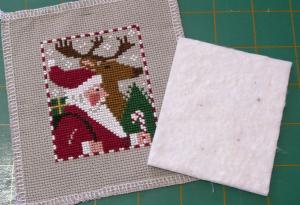
4. Now it’s time to attach the stitched piece to the padded mattboard.
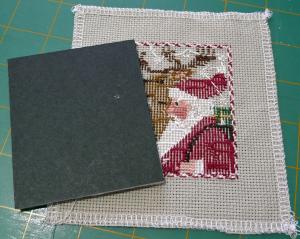
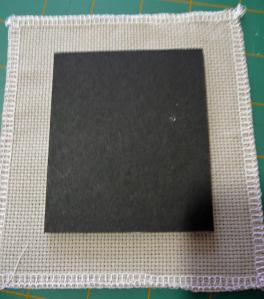
08
Turn the stitching over so the good side is facing down – place the padded mattboard padded-side down on top of the stitching.

09

10

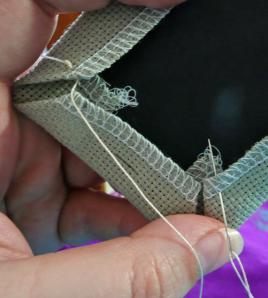
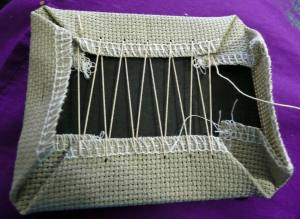
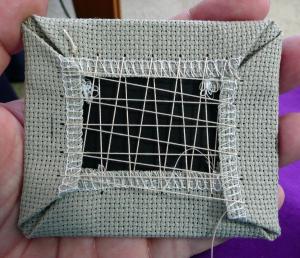
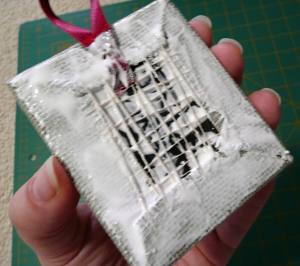
5. My instructions for the next part are in relation to lacing the ornie together – I’ve found that this gives a much cleaner finish on the front of the ornie, and in particular in the corners. If you don’t want to lace, you can just use glue to stick the sides down in the same way – you’ll just have to be careful that the glue doesn’t dry before you have the stitched piece nicely centred on the front.
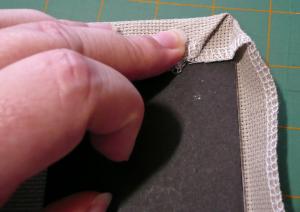
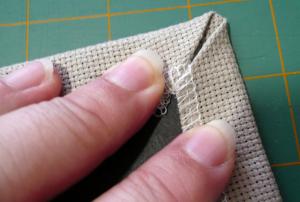
6. First of all I start by folding over the corners, then the sides. This ornie was stitched by my Mum on Aida, which is quite stiff and stays put, which is great 🙂

11

12

7. Next I start lacing – I usually start with a couple of little anchor stitches at the start, and use a waste knot to start with (this can be cut off later once the lacing is finished) – then you just work from one side of the ornie to the other, as you can see from the series of photos below.

13

14

8. At this point turn the stitched piece over and check that the stitching is sitting nicely centred over the mattboard. If it’s not centred perfectly, just give it a little jiggle around until it is nicely centred.

17a

9. Turn the ornie back over again, and continue to lace the remaining two sides. Now I usually stitch up the mitred corners, as this really tidies p the corners and gives nice clean points.

15

16

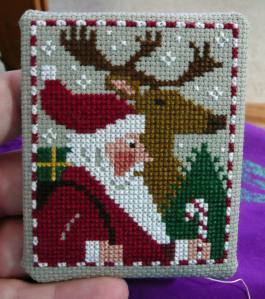
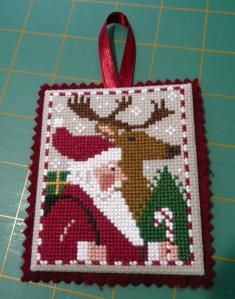
10. The finished version should look something like this if you’ve laced it according to my version.

17

24

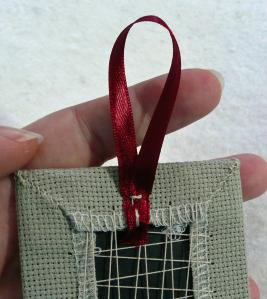
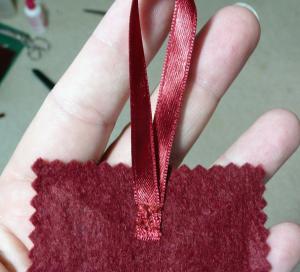
11. You now have the choice of adding your ribbon hanger now, or at the end. I always used to add my hanger at the end, but decided to try it this way for the tutorial, and have added the ribbon prior to adding the felt backing.
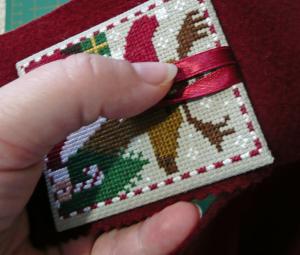
Cut a piece of ribbon to your preferred length – I ‘twist’ my ribbon to give it a nice loop, if you just fold it in half the ribbon doesn’t sit quite as nicely. Hopefully that makes sense, and you can see what I mean from the photos! Attach the ribbon with a couple of little stitches to attach it to the fabric – I prefer to stitch it rather than just gluing to ensure the ribbon hanger doesn’t fall off in a hurry.
18
19
12. Next, turn your ornie over and add glue to the back – I usually use Tacky Glue and once again I use a little offcut of mattboard to spread the glue out all over the backing, but this isn’t essential. I figure this will help to keep the glue stuck down for longer than just having a little bit on the edges 🙂
21
13. Now place your glued ornie down on the felt backing and ensure the felt is pressed down nice and evenly onto the glue. Then, using pinking shears, cut around the ornie shape – don’t forget to hold your ribbon hanger out of the way so it’s not accidentally lopped off!
22
23
14. If you prefer to add your ribbon hanger at the end, this is an example of one of my older finished ornies that I completed this way 🙂
19a
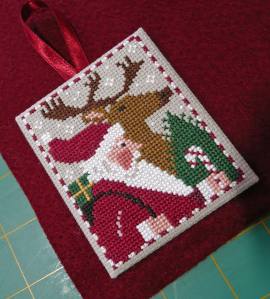
15. And you now have a beautifully finished ornie – all you have to do is to hang it up on your (or a loved one’s) tree! 😀
25
01

j0439073

I hope that’s easy enough to follow – if you have any questions, don’t hesitate to scream out and I’ll try to answer them.

j0439073