
Hello everyone, this weekend its time for our Flange Pillow class.

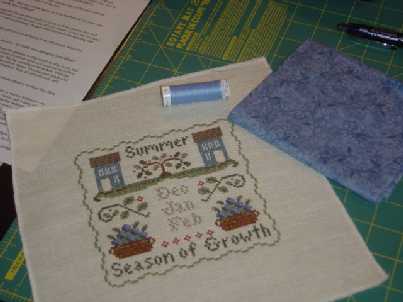
For the list of materials see here.
Anyone can do this project, its very easy and feel free to ask any questions if you are unsure of something 🙂
There are two parts to making a flange pillow, firstly, finishing the stitched piece and then making the pillow. Lets begin by getting the stitched piece ready.
(Please note: for my pillow I used 1/4 inch seam allowance)
Press your stitched piece from the back.
Measure out 1 inch from the stitched edge and trim. Cut some light coloured backing fabric (I used calico fabric) to match the same size as the stitched piece.

Place atop of stitched piece, right sides together. Sew together using a 1/4 inch seam, leaving a small opening for turning. Trim if you need to and turn right side out.

Press and blind stitch the opening closed.
————————————————————
Now for the Pillow: these next instructions are based on finishing a 9 1/2 inch square pillow, with the flange measuring 1 inch.
Cut two 9 3/4 inch squares from your coloured fabric. Now pin the two pieces right side together. Sew all around using 1/4″ seam, leaving a small opening for turning.

Turn in right way and press.
Mark 1″ from the edge all around the square on wrong side of pillow -this is where you will sew to make the flange. I use a water soluble pen to do this.

Start your sewing parrallel to the outside opening and sew around the square, finishing parrallel to the other end of outside opening.
Now you are ready to fill your pillow with stuffing.

Fill to desired “puffiness” and then you can either handsew the two openings closed or use your sewing machine. I sew the inside opening closed and then use a blind seam on outside edge.

Now its time to join on the stitched piece. Place stitched piece onto pillow and pin into place.

You can use buttons that have been covered in matching fabric, like I did, or other suitable buttons. Sew buttons onto four corners, sewing through the stitched piece to the pillow to secure.
That’s all there is to it – admire your pillow!!
I hope these instructions make sense -like I said earlier, please feel free to ask any questions if you have any. I know that some people will use a different sized stitched piece so the measurements will need to be adjusted to allow for that. If you need some help with working out what size your pillow will be, please let me know.
Also, please post a photo to the blog of your finished pillow as everyone would enjoy seeing them.
Have fun and happy sewing,
Katrina

Thank you Katrina for this excellent tutorial. I can’t wait to give it a try! 😀
Wonderful tutorial Katrina! Very detailed and clear explainations. Thank you.
Great tutorial Katrina – thank you!
Awesome tutorial, thanks Katrina! 😀
Hi Katrina: I’m just gathering my supplies together to give this pillow a try and I’m wondering what kind of buttons I need to buy if I want to cover them in fabric? I have never covered buttons with fabric before. Do you glue the fabric to the button?
Thanks for any advice you can give me. 😀
Hi Anne, for my pillow I used buttons that came in a little kit, similiar to the one on this website:
http://www.singermachines.co.uk/sewing_accessories/catalog.php?category=Cover+Buttons
It included instructions on how to cover the buttons and a little gizmo that did it for you.
If you can’t find any of these, you can easily cover buttons yourself and this website will help you:
http://www.marquise.de/en/themes/howto/knoepfe.shtml
good luck! Katrina
Anne, I’m not Katrina (:)) but you can buy buttons that you cover from Joann’s, like these ones: http://www.joann.com/joann/catalog.jsp?CATID=cat3677&PRODID=prd50054&source=search. Of course, I’m assuming you’re in the US?
Thank you Alison for the information. Actually I am in Canada but I think I may be able to find something similar to what Joann’s sells at my local fabric store. Thanks for your help! 😀
Great tutorial Katrina 🙂
Thank you for your help with the buttons Katrina. Off to my fabric store now to get some. 😀
Katrina, great tutorial, thanks a ton for writing it! Hopefully I have the skill for this so I can post a photo up for you to see! 🙂
I found your blog on google and read a few of your other posts. I just added you to my Google News Reader. Keep up the good work. Look forward to reading more from you in the future.
Thank you for the great tutorial. Incredibly helpful!
:o)
Thanks for giving advice on how to make these pillows. Fastening the corners with cloth-covered buttons may give it the ability to change the tops based on the holiday or season. Good tips.